Quick Summary:
Swift design patterns are intended to make it easier for programmers to write code. They assist developers in creating a simple and effective working environment. iOS design patterns are a set of repeatable techniques for creating apps. The iOS patterns are well-suited to addressing certain issues. Swift patterns can be used to solve specific issues. They assist in reducing the likelihood of errors occurring during the testing phase. As a result, the goal of iOS design patterns in Swift is to build simple, clean code that speeds up the development process while still providing high-quality results.
Swift, which first debuted in 2014, has quickly established itself as one of the most popular and frequently used programming languages for iOS app development. One of the most significant aspects of using Swift is finalizing the iOS design patterns to be used and the right ways to implement them. Because Swift is a relatively new language, a lot of developers struggle with the right choice. Using an accurate design pattern is a prerequisite to developing high-quality, functional, and stable applications.
In this article, we will look at the most commonly used design patterns in Swift, the benefits of using swiftui design patterns, and how to choose the right design patterns for ios development to help you make a smarter choice.
What are Swift Desing patterns?
A swiftui design pattern, in basic terms, is a solution to a specific challenge encountered while building iOS architecture patterns. However, it’s crucial to note that these swiftui design patterns aren’t just a piece of code that can be copied and pasted into an application. Instead, they’re a notion that shows how to address a problem. It’s similar to a template that shows you how to create code and solve an issue.
Types of Design Patterns in iOS App Development
There are 23 classic iOS design patterns probably first identified, collected, and explained all in one place by “Gang of Four” (GOF), Erich Gamma, Richard Helm, Ralph Johnson, and John Vlissides in their seminal book, “Design Patterns: Elements of Reusable Object-Oriented Software.” These Swiftui design patterns are divided into 4 groups.
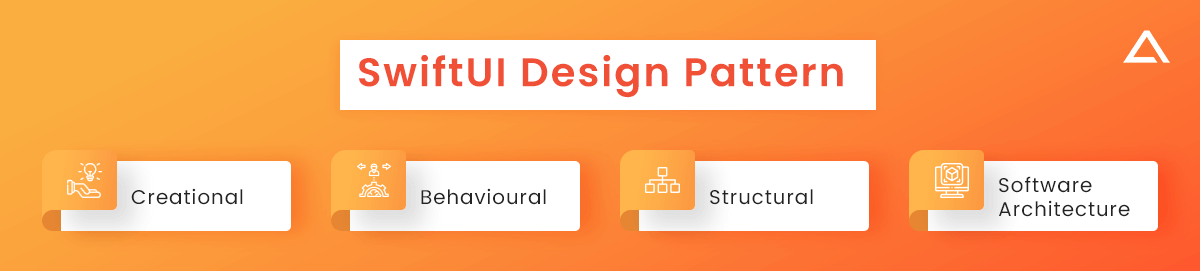
- Creational
- Behavioural
- Structural
- Software Architecture
The traits and usage of each iOS design pattern are described in this article.
Creational Desing Pattern Swift
One of the first swift design patterns categories for iOS app development is creational design patterns of swift. These design patterns are related to object creation mechanisms. They help to offer accurate facts to represent objects to be used in that specific situation. The most common creational design pattern methods are divided into 4 methods. They are as follows:
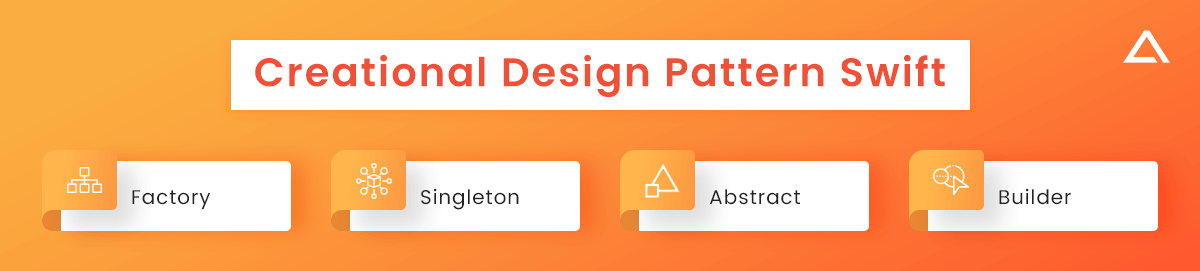
- Factory
- Singleton
- Abstract
- Builder
Structural Design Pattern Swift
The task of the Structural Design Pattern is to simplify designing and find an easy for correlate the classes and the objects. They are as follows:
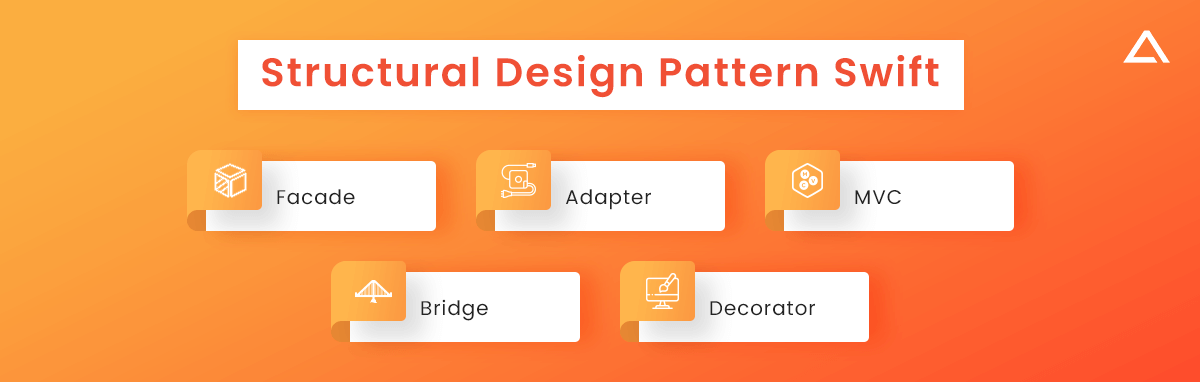
- Facade
- Adapter
- MVC
- Bridge
- Decorator
Behavioural Design Patterns Swift
Behavioural Design Patterns in Swift depicts a common pattern of communication between entities. Some common behavioural design patterns include Chain of Responsibility, Command, Template Method, and Iterator.
Behavioural Design Patterns Swift is a set of methods like:
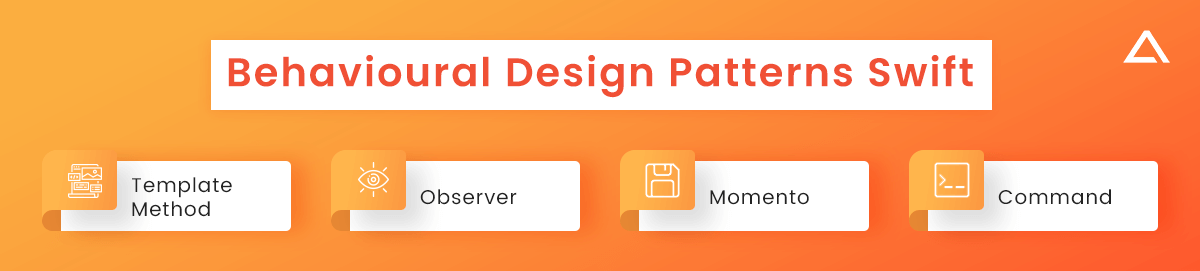
- Template Method
- Observer
- Momento
- Command
Now let’s take a look at the most used different design patterns in ios.
Also Check – Best iOS Open Source Libraries
Design Patterns are commonly used in iOS apps.
The following are some of the commonly used iOS design patterns in swift.

- Builder
- Facade
- MVC
- Singleton
- Template Method
- Decorator
- Viper
- MVVM
- Adaptor
- Observer
- Factory Method
Let’s talk about each iOS design pattern swift in detail.
Builder
Builder pattern swift is an iOS design element that is used to divide objects and configurations. Object creation, data groupings, and instructions are all handled by the iOS builder pattern. Swift’s builder pattern allows for a large number of configuration choices to be created. Thanks to these principles, the objects are also clearer, straightforward, and easy to test and debug.
When to use builder pattern in Swift for iOS apps?
- When avoiding telescopic constructor.
- When code is required to create many views of the specific object.
- When there is needed for composing the complex objects.
Example
// Design Patterns: Builder
import Foundation
// Models
enum DishCategory: Int {
    case firstCourses, mainCourses, garnishes, drinks
}
struct Dish {
    var name: String
    var price: Float
}
struct OrderItem {
    var dish: Dish
    var count: Int
}
struct Order {
    var firstCourses: [OrderItem] = []
    var mainCourses: [OrderItem] = []
    var garnishes: [OrderItem] = []
    var drinks: [OrderItem] = []
    var price: Float {
        let items = firstCourses + mainCourses + garnishes + drinks
        return items.reduce(Float(0), { $0 + $1.dish.price * Float($1.count) })
    }
}
// Builder
class OrderBuilder {
    private var order: Order?
    func reset() {
        order = Order()
    }
    func setFirstCourse(_ dish: Dish) {
        set(dish, at: order?.firstCourses, withCategory: .firstCourses)
    }
    func setMainCourse(_ dish: Dish) {
        set(dish, at: order?.mainCourses, withCategory: .mainCourses)
    }
    func setGarnish(_ dish: Dish) {
        set(dish, at: order?.garnishes, withCategory: .garnishes)
    }
    func setDrink(_ dish: Dish) {
        set(dish, at: order?.drinks, withCategory: .drinks)
    }
    func getResult() -> Order? {
        return order ?? nil
    }
    private func set(_ dish: Dish, at orderCategory: [OrderItem]?, withCategory dishCategory: DishCategory) {
        guard let orderCategory = orderCategory else {
            return
        }
        var item: OrderItem! = orderCategory.filter( { $0.dish.name == dish.name } ).first
        guard item == nil else {
            item.count += 1
            return
        }
        item = OrderItem(dish: dish, count: 1)
        switch dishCategory {
        case .firstCourses:
            order?.firstCourses.append(item)
        case .mainCourses:
            order?.mainCourses.append(item)
        case .garnishes:
            order?.garnishes.append(item)
        case .drinks:
            order?.drinks.append(item)
        }
    }
}
// Usage
let steak = Dish(name: "Steak", price: 2.30)
let chips = Dish(name: "Chips", price: 1.20)
let coffee = Dish(name: "Coffee", price: 0.80)
let builder = OrderBuilder()
builder.reset()
builder.setMainCourse(steak)
builder.setGarnish(chips)
builder.setDrink(coffee)
let order = builder.getResult()
order?.price
// Result:
// 4.30
Facade
The facade is another iOS UI design pattern on the list; it provides a simplified interface for sophisticated programs. It can generate classes to provide a simplified interface, regardless of the multiple methods with distinct interfaces when decomposing subsystems into distinct levels, such as remote servers, databases, file systems, and memory, the façade comes in handy. The iOS design pattern is appropriate for working in a variety of classes, particularly the more complex ones.
When to use Facade pattern in Swift for iOS apps?
- You want to provide a simple or unique interface to a complicated subsystem.
- You want to break down the subsystem into different layers.
Example
The framework of the Facade design pattern is illustrated in this example, which focuses on the following questions:
- What are the classes that make it up?
- What are the functions of these classes?
- What is the relationship between the pattern’s elements?
Following the pattern’s structure, you’ll find it easier to grasp the following example based on a real-world Swift use case.
import XCTest

/// The Facade class provides a simple interface to the complex logic of one or
/// several subsystems. The Facade delegates the client requests to the
/// appropriate objects within the subsystem. The Facade is also responsible for
/// managing their lifecycle. All of this shields the client from the undesired
/// complexity of the subsystem.
class Facade {
    private var subsystem1: Subsystem1
    private var subsystem2: Subsystem2
    /// Depending on your application's needs, you can provide the Facade with
    /// existing subsystem objects or force the Facade to create them on its
    /// own.
    init(subsystem1: Subsystem1 = Subsystem1(),
         subsystem2: Subsystem2 = Subsystem2()) {
        self.subsystem1 = subsystem1
        self.subsystem2 = subsystem2
    }
    /// The Facade's methods are convenient shortcuts to the sophisticated
    /// functionality of the subsystems. However, clients get only to a fraction
    /// of a subsystem's capabilities.
    func operation() -> String {

        var result = "Facade initializes subsystems:"
        result += " " + subsystem1.operation1()
        result += " " + subsystem2.operation1()
        result += "\n" + "Facade orders subsystems to perform the action:\n"
        result += " " + subsystem1.operationN()
        result += " " + subsystem2.operationZ()
        return result
    }
}

/// The Subsystem can accept requests either from the facade or client directly.
/// In any case, to the Subsystem, the Facade is yet another client, and it's
/// not a part of the Subsystem.
class Subsystem1 {

    func operation1() -> String {
        return "Sybsystem1: Ready!\n"
    }
    // ...
    func operationN() -> String {
        return "Sybsystem1: Go!\n"
    }
}
/// Some facades can work with multiple subsystems at the same time.
class Subsystem2 {
    func operation1() -> String {
        return "Sybsystem2: Get ready!\n"
    }
    // ...
    func operationZ() -> String {
        return "Sybsystem2: Fire!\n"
    }
}

/// The client code works with complex subsystems through a simple interface
/// provided by the Facade. When a facade manages the lifecycle of the
/// subsystem, the client might not even know about the existence of the
/// subsystem. This approach lets you keep the complexity under control.
class Client {
    // ...
    static func clientCode(facade: Facade) {
        print(facade.operation())
    }
    // ...
}
/// Let's see how it all works together.
class FacadeConceptual: XCTestCase {
    func testFacadeConceptual() {
        /// The client code may have some of the subsystem's objects already
        /// created. In this case, it might be worthwhile to initialize the
        /// Facade with these objects instead of letting the Facade create new
        /// instances.
        let subsystem1 = Subsystem1()
        let subsystem2 = Subsystem2()
        let facade = Facade(subsystem1: subsystem1, subsystem2: subsystem2)
        Client.clientCode(facade: facade)
    }
}
Output.txt: Execution result

Facade initializes subsystems: Sybsystem1: Ready!

Sybsystem2: Get ready!

Facade orders subsystems to act:

Sybsystem1: Go!

Sybsystem2: Fire!
MVC
One of the most used Swift architecture patterns is a model view controller or MVC. It simply classifies objects in an iOS app according to their needs, allowing for clear code separation by role. The 3 role that accompanies mechanism are as follows:
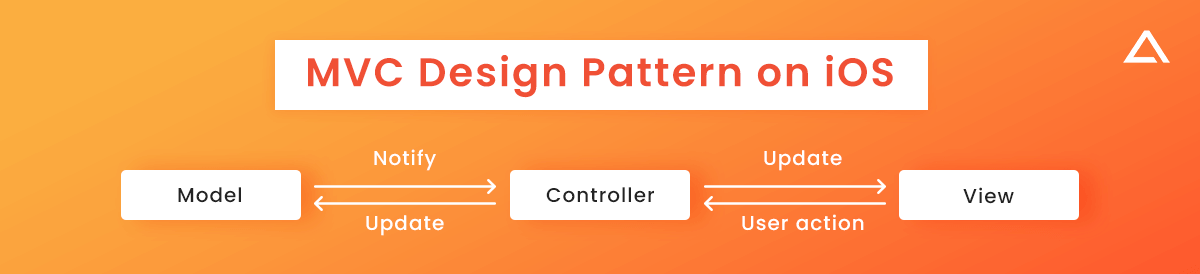
Model
The model is the first portion of MVC, and it stores and describes how to manipulate application data.
View
The second component of MVC is the object in charge of the model’s visual representation and user interactions.
Controller
The mediator between all of the tasks is the third and final portion of the MVC controller. The controller accesses all of the model’s data and then uses a view that manipulates it as needed.
The diagram depicts the entire communication mechanism of the MVC design pattern on iOS.
When to use MVC
- If you want to maintain the structure of data flow & to message
- If you want smooth transition and collaboration between your team and clients
- If you want to keep your code from becoming one big pile of chaos
Example
// Model
class Dog {
    var name: String?
    var legs: Int?
}

// Controller
class ViewController: UIViewController {

    // View from the storyboard - both labels
    @IBOutlet var petName: UILabel!
    @IBOutlet var petLegs: UILabel!

    // Controller continued
    override func viewDidLoad() {
        super.viewDidLoad()

        let fido = Dog()
        fido.name = "Fido"
        fido.legs = 4

        petName.text = fido.name!
        petLegs.text = "\(fido.legs!)"
    }
}
Singleton
The Singleton pattern in swift is all about creating a single instance of a class that has global access. When a single instance is required for the first time, it uses lazy loading.
You could be thinking, “What good is a single instance?” There are some possibilities and situations where only one instance of a class makes sense.
When to use Singleton
- When a program’s class should only have one instance for all clients
- When stricter control over global variables is required.
Example
import XCTest
/// Singleton Design Pattern
///
/// Intent: Ensure that class has a single instance and provide a global point
/// of access to it.
class SingletonRealWorld: XCTestCase {
func testSingletonRealWorld() {
/// There are two view controllers.
///
/// MessagesListVC displays a list of last messages from a user's chats.
/// ChatVC displays a chat with a friend.
///
/// FriendsChatService fetches messages from a server and provides all
/// subscribers (view controllers in our example) with new and removed
/// messages.
///
Both view controllers use /// FriendsChatService. It can be
/// implemented as an instance of a class as well as a global variable.
///
/// In this example, it is important to have only one instance that
/// performs resource-intensive work.
let listVC = MessagesListVC()
let chatVC = ChatVC()
listVC.startReceiveMessages()
chatVC.startReceiveMessages()
/// ... add view controllers to the navigation stack ...
}
}
class BaseVC: UIViewController, MessageSubscriber {
func accept(new messages: [Message]) {
/// handle new messages in the base class
}
func accept(removed messages: [Message]) {
/// handle removed messages in the base class
}
func startReceiveMessages() {
/// The singleton can be injected as a dependency. However, from an
/// informational perspective, this example calls FriendsChatService
/// directly to illustrate the intent of the pattern, which is: "...to
/// provide the global point of access to the instance..."
FriendsChatService.shared.add(subscriber: self)
}
}
class MessagesListVC: BaseVC {
override func accept(new messages: [Message]) {
print("MessagesListVC accepted 'new messages'")
/// handle new messages in the child class
}
override func accept(removed messages: [Message]) {
print("MessagesListVC accepted 'removed messages'")
/// handle removed messages in the child class
}
override func startReceiveMessages() {
print("MessagesListVC starts receive messages")
super.startReceiveMessages()
}
}
class ChatVC: BaseVC {
override func accept(new messages: [Message]) {
print("ChatVC accepted 'new messages'")
/// handle new messages in the child class
}
override func accept(removed messages: [Message]) {
print("ChatVC accepted 'removed messages'")
/// handle removed messages in the child class
}
override func startReceiveMessages() {
print("ChatVC starts receive messages")
super.startReceiveMessages()
}
}
/// Protocol for call-back events
protocol MessageSubscriber {
func accept(new messages: [Message])
func accept(removed messages: [Message])
}
/// Protocol for communication with a message service
protocol MessageService {
func add(subscriber: MessageSubscriber)
}
/// Message domain model
struct Message {
let id: Int
let text: String
}
class FriendsChatService: MessageService {
static let shared = FriendsChatService()
private var subscribers = [MessageSubscriber]()
func add(subscriber: MessageSubscriber) {
/// In this example, fetching starts again by adding new subscriber
subscribers.append(subscriber)
/// Please note, the first subscriber will receive messages again when
/// the second subscriber is added
startFetching()
}
func startFetching() {
/// Set up the network stack, establish a connection...
/// ...and retrieve data from a server
let newMessages = [Message(id: 0, text: "Text0"),
Message(id: 5, text: "Text5"),
Message(id: 10, text: "Text10")]
let removedMessages = [Message(id: 1, text: "Text0")]
/// Send updated data to subscribers
receivedNew(messages: newMessages)
receivedRemoved(messages: removedMessages)
}
}
private extension FriendsChatService {
func receivedNew(messages: [Message]) {
subscribers.forEach { item in
item.accept(new: messages)
}
}
func receivedRemoved(messages: [Message]) {
subscribers.forEach { item in
item.accept(removed: messages)
}
}
}

Output.txt: Execution result

MessagesListVC starts receive messages

MessagesListVC accepted 'new messages'

MessagesListVC accepted 'removed messages'

======== At this point, the second subscriber is added ======

ChatVC starts receive messages

MessagesListVC accepted 'new messages'

ChatVC accepted 'new messages'

MessagesListVC accepted 'removed messages'

ChatVC accepted 'removed messages'
Adapter
The adaptor pattern in swift is a structural design pattern that makes it possible for objects with incompatible or mismatched interfaces to function together. The adapter would enclose the object that dealt with meters and convert the data to feet.
As a result, the Adapter can be used when implementing third-party classes when the interface is out of sync with the rest of the application code. You can also use it when you need to use a variety of existing subclasses that don’t all have the same capabilities.
When to use Adaptor
- When you need to use a third-party class, the interface doesn’t match the code in your project.
- When you wish to employ several different subclasses, but none of them have a specified function.
Example
import XCTest

import UIKit

/// Adapter Design Pattern

///

/// Intent: Convert the interface of a class into the interface clients expect.

/// Adapter lets classes work together that couldn't work otherwise because of

/// incompatible interfaces.

class AdapterRealWorld: XCTestCase {

/// Example. Let's assume that our app perfectly works with Facebook

/// authorization. However, users ask you to add sign-in via Twitter.

///

/// Unfortunately, Twitter SDK has a different authorization method.

///

/// Firstly, you have to create the new protocol 'AuthService' and insert

/// the authorization method of Facebook SDK.

///

/// Secondly, write an extension for Twitter SDK and implement methods of

/// AuthService protocol, just a simple redirect.

///

/// Thirdly, write an extension for Facebook SDK. You should not write any

/// code at this point as methods already implemented by Facebook SDK.

///

/// It just tells a compiler that both SDKs have the same interface.

func testAdapterRealWorld() {

print("Starting an authorization via Facebook")

startAuthorization(with: FacebookAuthSDK())

print("Starting an authorization via Twitter.")

startAuthorization(with: TwitterAuthSDK())

}

func startAuthorization(with service: AuthService) {

/// The current top view controller of the app

let topViewController = UIViewController()
service.presentAuthFlow(from: topViewController)

}

}

protocol AuthService {

func presentAuthFlow(from viewController: UIViewController)

}
class FacebookAuthSDK {

func presentAuthFlow(from viewController: UIViewController) {

/// Call SDK methods and pass a view controller

print("Facebook WebView has been shown.")

}

}
class TwitterAuthSDK {

func startAuthorization(with viewController: UIViewController) {

/// Call SDK methods and pass a view controller

print("Twitter WebView has been shown. Users will be happy :)")

}

}

extension TwitterAuthSDK: AuthService {

/// This is an adapter

///

/// Yeah, we cannot create another class and just extend an

/// existing one

func presentAuthFlow(from viewController: UIViewController) {

print("The Adapter is called! Redirecting to the original method...")

self.startAuthorization(with: viewController)

}

}
extension FacebookAuthSDK: AuthService {

/// This extension just tells a compiler that both SDKs have the same

/// interface.

}

Output.txt: Execution result

Starting an authorization via Facebook

Facebook WebView has been shown

///

Starting an authorization via Twitter

The Adapter is called! Redirecting to the original method...

Twitter WebView has been shown. Users will be happy :)
Decorator
The Decorator design pattern in swift helps you add additional functionalities to an object and wrap them in wrappers. As a result, it’s also called the Wrapper design pattern. It allows you to add behaviour and responsibility to an object without changing the code.
When using third-party libraries, the decorator has the advantage of not requiring you to read the source code. The integration of data management in the iOS application is an excellent example of this type of technique. EncryptionDecorator and EncodingDecorator are two types of decorators used for encrypting and decrypting data and encoding and decoding.
When to use Decorator
- When it is not used to add new functionalities through inheritance
- When you want to add functionalities to the object but at the same time want to hide them from code.
Example
import UIKit

import XCTest

protocol ImageEditor: CustomStringConvertible {

func apply() -> UIImage

}

class ImageDecorator: ImageEditor {

private var editor: ImageEditor

required init(_ editor: ImageEditor) {

self.editor = editor

}

func apply() -> UIImage {

print(editor.description + " applies changes")

return editor.apply()

}

var description: String {

return "ImageDecorator"

}

}

extension UIImage: ImageEditor {

func apply() -> UIImage {

return self

}

open override var description: String {

return "Image"

}

}

class BaseFilter: ImageDecorator {

fileprivate var filter: CIFilter?

init(editor: ImageEditor, filterName: String) {

self.filter = CIFilter(name: filterName)

super.init(editor)

}

required init(_ editor: ImageEditor) {

super.init(editor)

}

override func apply() -> UIImage {

let image = super.apply()

let context = CIContext(options: nil)

filter?.setValue(CIImage(image: image), forKey: kCIInputImageKey)

guard let output = filter?.outputImage else { return image }

guard let coreImage = context.createCGImage(output, from: output.extent) else {

return image

}

return UIImage(cgImage: coreImage)

}

override var description: String {

return "BaseFilter"

}

}

class BlurFilter: BaseFilter {

required init(_ editor: ImageEditor) {

super.init(editor: editor, filterName: "CIGaussianBlur")

}

func update(radius: Double) {

filter?.setValue(radius, forKey: "inputRadius")

}

override var description: String {

return "BlurFilter"

}

}

class ColorFilter: BaseFilter {

required init(_ editor: ImageEditor) {

super.init(editor: editor, filterName: "CIColorControls")

}

func update(saturation: Double) {

filter?.setValue(saturation, forKey: "inputSaturation")

}

func update(brightness: Double) {

filter?.setValue(brightness, forKey: "inputBrightness")

}

func update(contrast: Double) {

filter?.setValue(contrast, forKey: "inputContrast")

}

override var description: String {

return "ColorFilter"

}

}

class Resizer: ImageDecorator {

private var xScale: CGFloat = 0

private var yScale: CGFloat = 0

private var hasAlpha = false

convenience init(_ editor: ImageEditor, xScale: CGFloat = 0, yScale: CGFloat = 0, hasAlpha: Bool = false) {

self.init(editor)

self.xScale = xScale

self.yScale = yScale

self.hasAlpha = hasAlpha

}

required init(_ editor: ImageEditor) {

super.init(editor)

}

override func apply() -> UIImage {

let image = super.apply()

let size = image.size.applying(CGAffineTransform(scaleX: xScale, y: yScale))

UIGraphicsBeginImageContextWithOptions(size, !hasAlpha, UIScreen.main.scale)

image.draw(in: CGRect(origin: .zero, size: size))

let scaledImage = UIGraphicsGetImageFromCurrentImageContext()

UIGraphicsEndImageContext()

return scaledImage ?? image

}

override var description: String {

return "Resizer"

}

}

class DecoratorRealWorld: XCTestCase {

func testDecoratorRealWorld() {

let image = loadImage()

print("Client: set up an editors stack")

let resizer = Resizer(image, xScale: 0.2, yScale: 0.2)

let blurFilter = BlurFilter(resizer)

blurFilter.update(radius: 2)

let colorFilter = ColorFilter(blurFilter)

colorFilter.update(contrast: 0.53)

colorFilter.update(brightness: 0.12)

colorFilter.update(saturation: 4)

clientCode(editor: colorFilter)

}

func clientCode(editor: ImageEditor) {

let image = editor.apply()

/// Note. You can stop an execution in Xcode to see an image preview.

print("Client: all changes have been applied for \(image)")

}

}

private extension DecoratorRealWorld {

func loadImage() -> UIImage {

let urlString = "https:// refactoring.guru/images/content-public/logos/logo-new-3x.png"

/// Note:

/// Do not download images the following way in a production code.

guard let url = URL(string: urlString) else {

fatalError("Please enter a valid URL")

}

guard let data = try? Data(contentsOf: url) else {

fatalError("Cannot load an image")

}

guard let image = UIImage(data: data) else {

fatalError("Cannot create an image from data")

}

return image

}

}

Output.txt: Execution result

Client: set up an editors stack

BlurFilter applies changes

Resizer applies changes

Image applies changes

Client: all changes have been applied for Image
Template Method
The template method is a behavioural design pattern in swift that describes an algorithm’s skeleton and assigns responsibility for specific phases to subclasses. This pattern enables subclasses to rewrite certain phases of an algorithm without affecting the method’s general structure.
This design pattern in ios breaks down an algorithm into a series of steps, separates them into methods, and calls them one after the other using a single template method.
When to use
- When you need to extend a basic algorithm without modifying its structure.
- When you have various classes responsible for similar actions.
Example
import XCTest

import AVFoundation

import CoreLocation

import Photos

class TemplateMethodRealWorld: XCTestCase {

/// A good example of Template Method is a life cycle of UIViewController

func testTemplateMethodReal() {

let accessors = [CameraAccessor(), MicrophoneAccessor(), PhotoLibraryAccessor()]

accessors.forEach { item in

item.requestAccessIfNeeded({ status in

let message = status ? "You have access to " : "You do not have access to "

print(message + item.description + "\n")

})

}

}

}

class PermissionAccessor: CustomStringConvertible {

typealias Completion = (Bool) -> ()

func requestAccessIfNeeded(_ completion: @escaping Completion) {

guard !hasAccess() else { completion(true); return }

willReceiveAccess()

requestAccess { status in

status ? self.didReceiveAccess() : self.didRejectAccess()

completion(status)

}

}

func requestAccess(_ completion: @escaping Completion) {

fatalError("Should be overridden")

}

func hasAccess() -> Bool {

fatalError("Should be overridden")

}

var description: String { return "PermissionAccessor" }

/// Hooks

func willReceiveAccess() {}

func didReceiveAccess() {}

func didRejectAccess() {}

}

class CameraAccessor: PermissionAccessor {

override func requestAccess(_ completion: @escaping Completion) {

AVCaptureDevice.requestAccess(for: .video) { status in

return completion(status)

}

}

override func hasAccess() -> Bool {

return AVCaptureDevice.authorizationStatus(for: .video) == .authorized

}

override var description: String { return "Camera" }

}

class MicrophoneAccessor: PermissionAccessor {

override func requestAccess(_ completion: @escaping Completion) {

AVAudioSession.sharedInstance().requestRecordPermission { status in

completion(status)

}

}

override func hasAccess() -> Bool {

return AVAudioSession.sharedInstance().recordPermission == .granted

}

override var description: String { return "Microphone" }

}

class PhotoLibraryAccessor: PermissionAccessor {

override func requestAccess(_ completion: @escaping Completion) {

PHPhotoLibrary.requestAuthorization { status in

completion(status == .authorized)

}

}

override func hasAccess() -> Bool {

return PHPhotoLibrary.authorizationStatus() == .authorized

}

override var description: String { return "PhotoLibrary" }

override func didReceiveAccess() {

/// We want to track how many people give access to the PhotoLibrary.

print("PhotoLibrary Accessor: Receive access. Updating analytics...")

}

override func didRejectAccess() {

/// ... and also we want to track how many people rejected access.

print("PhotoLibrary Accessor: Rejected with access. Updating analytics...")

}

}

Output.txt: Execution result

You have access to the Camera.

You have access to a Microphone.

PhotoLibrary Accessor: Rejected with access. Updating analytics...

You do not have access to the photo library
MVVM
MMVM design pattern in swift is one of the most popular apps among dedicated iOS developers. Visual aspects such as animation, UI components, layout, and make up the View in the MVVM architecture.
Furthermore, the ViewModel layer, which sits between the View and the Model, expresses the view canonically. As a result, the ViewModel provides a set of interfaces representing UI elements in the view.
MMVM Pattern in Swift design for constructing iOS design patterns applications, the MVVM version aids. Expert developers understand when to utilize MVC and when to use MVVM depending on the situation.
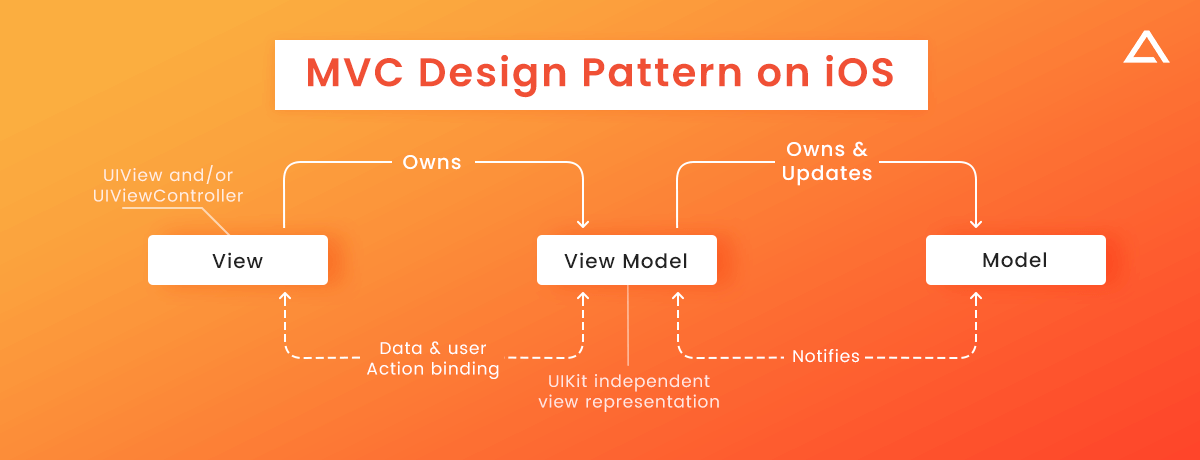
View Controller: It only does UI-related tasks, such as displaying and retrieving data. A layer of the view
View Model: It gets data from VC, processes it, and then transmits it to the source.
Model: This is just your model; there’s nothing special about it. The model is the same as in MVC. It’s used by VM and gets updated whenever the latter sends out new updates.
The communication between MVVM design patterns in ios is explained below.
Observer
The Observer pattern in swift defines a one-to-many relationship between objects. The term “dependence” refers to the fact that when one object’s state changes, its dependents are automatically notified and changed.
Subjects and observers are loosely related in an observer design pattern, commonly known as a publish and subscribe paradigm. The communication takes happen between the observer and observed things here, with neither party needing to know anything about the other.
When to use
- When you have several objects relying on another object
- When your object requires to act with the state of object change.
- When objects need to notify others without disclosing who they are
Example
import XCTest

class ObserverRealWorld: XCTestCase {

func test() {

let cartManager = CartManager()

let navigationBar = UINavigationBar()

let cartVC = CartViewController()

cartManager.add(subscriber: navigationBar)

cartManager.add(subscriber: cartVC)

let apple = Food(id: 111, name: "Apple", price: 10, calories: 20)

cartManager.add(product: apple)

let tShirt = Clothes(id: 222, name: "T-shirt", price: 200, size: "L")

cartManager.add(product: tShirt)

cartManager.remove(product: apple)

}

}

protocol CartSubscriber: CustomStringConvertible {

func accept(changed cart: [Product])

}

protocol Product {

var id: Int { get }

var name: String { get }

var price: Double { get }

func isEqual(to product: Product) -> Bool

}

extension Product {

func isEqual(to product: Product) -> Bool {

return id == product.id

}

}

struct Food: Product {

var id: Int

var name: String

var price: Double

/// Food-specific properties

var calories: Int

}

struct Clothes: Product {

var id: Int

var name: String

var price: Double

/// Clothes-specific properties

var size: String

}

class CartManager {

private lazy var cart = [Product]()

private lazy var subscribers = [CartSubscriber]()

func add(subscriber: CartSubscriber) {

print("CartManager: I'am adding a new subscriber: \(subscriber.description)")

subscribers.append(subscriber)

}

func add(product: Product) {

print("\nCartManager: I'am adding a new product: \(product.name)")

cart.append(product)

notifySubscribers()

}

func remove(subscriber filter: (CartSubscriber) -> (Bool)) {

guard let index = subscribers.firstIndex(where: filter) else { return }

subscribers.remove(at: index)

}

func remove(product: Product) {

guard let index = cart.firstIndex(where: { $0.isEqual(to: product) }) else { return }

print("\nCartManager: Product '\(product.name)' is removed from a cart")

cart.remove(at: index)

notifySubscribers()

}

private func notifySubscribers() {

subscribers.forEach({ $0.accept(changed: cart) })

}

}

extension UINavigationBar: CartSubscriber {

func accept(changed cart: [Product]) {

print("UINavigationBar: Updating an appearance of navigation items")

}

open override var description: String { return "UINavigationBar" }

}

class CartViewController: UIViewController, CartSubscriber {

func accept(changed cart: [Product]) {

print("CartViewController: Updating an appearance of a list view with products")

}

open override var description: String { return "CartViewController" }

}

Output.txt: Execution result

CartManager: I'am adding a new subscriber: UINavigationBar

CartManager: I'am adding a new subscriber: CartViewController

CartManager: I'm adding a new product: Apple

UINavigationBar: Updating the appearance of navigation items

CartViewController: Updating an appearance of a list view with products

CartManager: I'm adding a new product: a T-shirt

UINavigationBar: Updating the appearance of navigation items

CartViewController: Updating an appearance of a list view with products

CartManager: Product 'Apple' is removed from a cart

UINavigationBar: Updating the appearance of navigation items

CartViewController: Updating an appearance of a list view with products
Viper
Viper Design pattern in swift is another commonly used swift architectural pattern like MVC and MVVM. Every single component in Viper corresponds to architectural components mentioned as below:
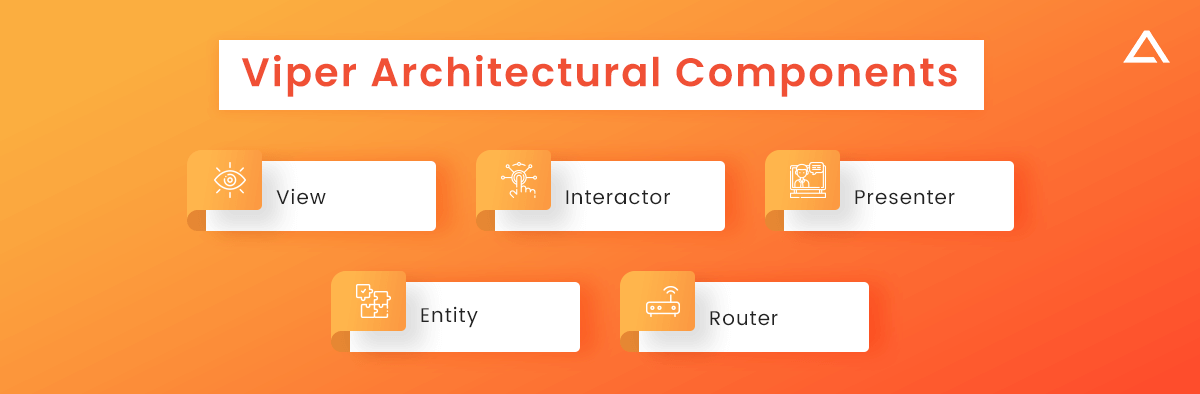
- View
- Interactor
- Presenter
- Entity
- Router
View: This section contains the code for displaying the app UI to users and collecting feedback. The Presenter is then notified of the user’s response.
Interactor: Component communicates between data and presenter.
Presenter: This is the most crucial architecture component, frequently referred to as the “traffic cop.” It’s the only class that can communicate with the rest of the system. The presenter passes data between the view and the interactor, wireframes the UI with the router, and updates the UI with the view.
Entity: Represents the application data
Router: manages navigation between the screens
Example
import UIKit

struct Person { // Entity (usually more complex e.g. NSManagedObject)

let firstName: String

let lastName: String

}

struct GreetingData { // Transport data structure (not Entity)

let greeting: String

let subject: String

}

protocol GreetingProvider {

func provideGreetingData()

}

protocol GreetingOutput: class {

func receiveGreetingData(greetingData: GreetingData)

}

class GreetingInteractor : GreetingProvider {

weak var output: GreetingOutput!

func provideGreetingData() {

let person = Person(firstName: "David", lastName: "Blaine") // usually comes from data access layer

let subject = person.firstName + " " + person.lastName

let greeting = GreetingData(greeting: "Hello", subject: subject)

self.output.receiveGreetingData(greeting)

}

}

protocol GreetingViewEventHandler {

func didTapShowGreetingButton()

}

protocol GreetingView: class {

func setGreeting(greeting: String)

}

class GreetingPresenter : GreetingOutput, GreetingViewEventHandler {

weak var view: GreetingView!

var greetingProvider: GreetingProvider!

func didTapShowGreetingButton() {

self.greetingProvider.provideGreetingData()

}

func receiveGreetingData(greetingData: GreetingData) {

let greeting = greetingData.greeting + " " + greetingData.subject

self.view.setGreeting(greeting)

}

}

class GreetingViewController : UIViewController, GreetingView {

var eventHandler: GreetingViewEventHandler!

let showGreetingButton = UIButton()

let greetingLabel = UILabel()

override func viewDidLoad() {

super.viewDidLoad()

self.showGreetingButton.addTarget(self, action: "didTapButton:", forControlEvents: .TouchUpInside)

}

func didTapButton(button: UIButton) {

self.eventHandler.didTapShowGreetingButton()

}

func setGreeting(greeting: String) {

self.greetingLabel.text = greeting

}

// layout code goes here

}

// Assembling of VIPER module, without Router

let view = GreetingViewController()

let presenter = GreetingPresenter()

let interactor = GreetingInteractor()

view.eventHandler = presenter

presenter.view = view

presenter.greetingProvider = interactor

interactor.output = presenter
Factory Method
When deciding between protocol integrated Classes and Base classes, the Factory pattern in Swift is required. These classes are determined logically. This technique’s complete reasoning comprises the method. You must pick between a global method class and a base class here.
When to use
- When an object class isn’t sure what sub-class to build,
- When an object class is built so that sub-classes define the objects it creates.
- When an object delegates its responsibilities to auxiliary sub-classes and doesn’t know which class will take on which responsibilities.
Example
import XCTest

class FactoryMethodRealWorld: XCTestCase {

func testFactoryMethodRealWorld() {

let info = "Very important info of the presentation"

let clientCode = ClientCode()

/// Present info over WiFi

clientCode.present(info: info, with: WifiFactory())

/// Present info over Bluetooth

clientCode.present(info: info, with: BluetoothFactory())

}

}

protocol ProjectorFactory {

func createProjector() -> Projector

func syncedProjector(with projector: Projector) -> Projector

}

extension ProjectorFactory {

/// Base implementation of ProjectorFactory

func syncedProjector(with projector: Projector) -> Projector {

/// Every instance creates an own projector

let newProjector = createProjector()

/// sync projectors

newProjector.sync(with: projector)

return newProjector

}

}

class WifiFactory: ProjectorFactory {

func createProjector() -> Projector {

return WifiProjector()

}

}

class BluetoothFactory: ProjectorFactory {

func createProjector() -> Projector {

return BluetoothProjector()

}

}

protocol Projector {

/// Abstract projector interface

var currentPage: Int { get }

func present(info: String)

func sync(with projector: Projector)

func update(with page: Int)

}

extension Projector {

/// Base implementation of Projector methods

func sync(with projector: Projector) {

projector.update(with: currentPage)

}

}

class WifiProjector: Projector {

var currentPage = 0

func present(info: String) {

print("Info is presented over Wifi: \(info)")

}

func update(with page: Int) {

/// ... scroll page via WiFi connection

/// ...

currentPage = page

}

}

class BluetoothProjector: Projector {

var currentPage = 0

func present(info: String) {

print("Info is presented over Bluetooth: \(info)")

}

func update(with page: Int) {

/// ... scroll page via Bluetooth connection

/// ...

currentPage = page

}

}

private class ClientCode {

private var currentProjector: Projector?

func present(info: String, with factory: ProjectorFactory) {

/// Check wheater a client code is already present smth...

guard let projector = currentProjector else {

/// 'currentProjector' variable is nil. Create a new projector and

/// start presentation.

let projector = factory.createProjector()

projector.present(info: info)

self.currentProjector = projector

return

}

/// Client code already has a projector. Let's sync pages of the old

/// projector with a new one.

self.currentProjector = factory.syncedProjector(with: projector)

self.currentProjector?.present(info: info)

}

}

Output.txt: Execution result

Info is presented over Wifi: Very important info of the presentation

Info is presented over Bluetooth: Very important info of the presentation
How To Select The Right Swift Design Patterns
Let’s look at the factors that should be kept in mind while selecting the right swift design patterns.
| Determine out how the design pattern in swift solves the issues | App development is made easier by using iOS design patterns. There are a variety of issues that can arise during the development process that must be addressed swiftly. You must determine how a specific design can help you tackle these issues. |
| Purpose of Design Patterns in iOS Swift | The next step will be determining the purpose of the iOS design pattern. |
| Design Pattern Correlation | When choosing numerous swiftui design patterns, make sure they all work together. This will assist you in selecting a group of patterns that can be integrated easily for more efficient work. |
| Design Pattern Comparisoin | Some designs are intertwined, and they can’t be used without the others. As a result, comparing these groupings of patterns to determine their similarities and differences is crucial. |
| Reason for redesign | All challenges should be solved with design patterns to eliminate the need to rethink the product. As a result, your choice is influenced by the kind of issues you seek to solve. |
| Define variable part of the design | An iOS design pattern allows you to make changes without having to start from scratch. You may easily correct the problem. All you have to do now is pick which aspects of the design can be changed. As a result, it will specify appropriate design patterns. |
Also Check – Swift vs Dart – Unveil the Ultimate Comparision in 2025
Benefits Of Using Swift Design Patterns
Let’s see the benefits that the swift design patterns offer. They are as follows:
- Unifying the codes.
- During the coding or construction of the solution architecture, define and display defects and future problems.
- iOS Design patterns outline how developers should proceed and what solutions they should incorporate to avoid making mistakes again.
- Design patterns in Swift help define errors quickly and save time when it comes to correcting them.
have a unique app Idea?
Hire Certified Developers To Build Robust Feature, Rich App And Websites
Popular iOS Apps Developed Using Swift Design Patterns.
Wrapping Up
In a word, these are the swift design patterns that you should be aware of when creating an iOS app. Distinct iOS patterns have different roles to allow more flexibility and interaction amongst the items. Developers may learn everything they need to know about them to achieve the iOS platform’s desired development. Choosing the proper swift design pattern is critical for creating a fully working and secure app. These design patterns used in ios make it simple to maintain and upgrade the app.


 Say
Say