Quick Summary:
Want to unlock a smoother, faster React app? Dive into the world of React performance optimization techniques and best practices. Understand the performance optimization strategies such as functional components, Memoization, and minimizing DOM updates used to improve react performance optimization. Discover how React DevTools become your weapon to pinpoint bottlenecks. Get ready to provide the best user experience!
React almost guarantees faster UI than most competitors due to its internal performance-driven development approach. However, when your React app begins to scale, you might notice a few performance issues or lags.
React’s internal optimization tricks might not suffice to sustain the increasing traffic and complexity of your rapidly growing or enterprise-grade React app.
This is where the question arises ‘how to improve performance in React js?’. So, if you’re looking for ways to enhance React app performance or speed up React, we have you covered! Before diving deep in the rabbit hole of React performance optimization tips and tricks, let’s first understand why and when is it required.
Why Optimize React Performance?
Is React not performant by itself? Why should I worry about optimizing React app performance? These questions may feel very familiar to all the developers out there, or even clients, since they raise this question as a sincere concern.
Well to answer it shortly, React is a highly performant and capable library. And, it has scope to be even better with the help of some industry-grade React performance optimization best practices. Here are some reasons it’s worth your time and efforts –

Smoother User Experience
Improved performance directly links to smoother user experience due to faster loading times and seamless interactions, resulting in increased user satisfaction.
Better SEO Rankings
Search engines always prioritize websites with faster loading time, maintained uptime, and other such performance-oriented metrics. An optimized React website, could translate to improved search ranking visibility.
Improved Conversion Rates
More the faster and responsive the site, more the chances of the visitor turning to a customer, increasing number of sign-ups, purchases or other decision-driven behavior.
Enhanced Scalability
Optimizing React applications will increase its capacity and capability to handle larger traffic volumes and sudden traffic spikes, accommodating growth without risking or sacrificing performance.
When to Optimize React Performance?
Just knowing why and how to optimize React performance is not sufficient for a successful optimization effort. Any effort to improve performance is futile without an end goal in mind. If you are struggling to decide whether you should optimize your project or not, here are certain scenarios, where focusing on optimization is particularly important –

1. Slow Page Load Times
The duration required for the page to fully load and show all its content is indicated by this parameter. Better user experiences are typically the result of faster load times. The recent stats from Forbes, suggest that:
Here are shorter versions of those statistics:
- 47% abandon sites taking over 2 seconds to load.
- 40% leave if a site takes more than 3 seconds to load.
- 88% won’t revisit a site after a bad experience
2. Unresponsive UI
Test your application with load testing or at random hours during the day to check if the app encounters frequent lags or unresponsiveness. Such laggy and unresponsive UI can lead to increased bounce rates. Hence, optimizing React performance can help ensure a seamless user experience by avoiding such situations.
3. Network or Latency Issues
If your users are experiencing delays due to latency issues, optimizing the React codebase can help minimize the impact of network delays on your application performance by optimizing rendering and data fetching processes. You can face the network or latency issues when you’re using context to pass data between the many components at the nesting level instead of Redux. Using context makes components reuse more difficult.
4. Large Data Sets or Data Lists
If your application hosts a large set of lists, optimizing React performance becomes crucial to ensure smooth scrolling and efficient rendering of data, especially on mobile devices or legacy browsers.
5. Complex Component Hierarchies
As your app scales, it grows in complexity and the component hierarchy becomes more nested. Optimizing such a deeply nested React app can help improve rendering performance and reduce the time taken to reflect data change on the UI significantly.
6. Memory Resource Usage
When your application is causing memory overhead on the user’s CPU resources, it is a clear indication towards the need for optimizing React performance. To check the resource usage of React application, you can make use of React development tools like ReactDevTools. If you need assistance towards optimizing memory issues of your React application, you can hire ReactJS developers from a reputable IT partner.
Now, that you are clear about the factors that you need to measure to optimize react performance. Let’s move on to the react performance tips, that you can utilize to improve react performance.
React Performance Optimization Techniques
Let’s delve into the essential React Performance Optimization Techniques and Strategies aimed at enhancing the performance of your React apps. From identifying performance bottlenecks to implementing advanced optimization strategies, we explore the key steps that will not only elevate your performance optimization React game but also pave the way for top-notch React app performance optimization. Performance in react can be understood in two ways 1) Loading Performance 2) Runtime Performance. For better understanding of react performance optimization techniques we have divided the list in 2 parts namely Loading performance & Runtime performance.
But before that let’s understand what Loading & Runtime performance means.

Loading performance: Compress & Loads assests/code (Mostly Non-React Things)
Runtime Performance: CPU & rendering issues (mostly React-specific things
Let’s begin with the curated list of React Performance Optimization
Runtime Performance List
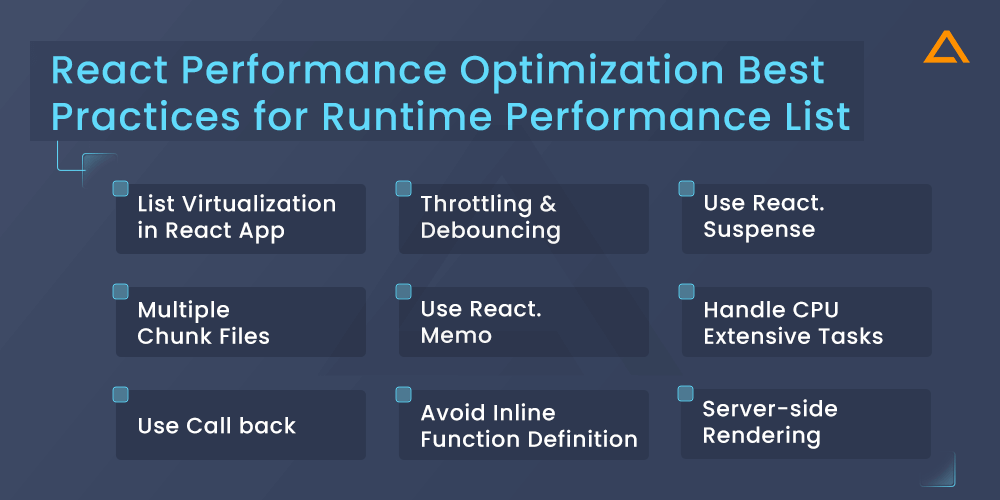
Following are the react performance optimization best practices under the runtime performance list.
✬ List Virtualization in React App
This react performance tuning technique is used when you want to render a large list of data or a table with enormous data, it can significantly slow down your app’s performance. Virtualization can help in such scenarios like this with the help of libraries like react-windows. It helps solve this problem by rendering only currently visible items in the list. Which in turn allows the rendering of lists of any size.
import { FixedSizeList } from "react-window";

function VirtualizedList() {
  const listRef = useRef();

  const rowRenderer = ({ index, style }) => (
    <div style={style}>{/* Render item #index */}</div>
  );

  return (
    <FixedSizeList
      ref={listRef}
      height={500}
      width={300}
      itemCount={1000}
      itemSize={50}
    >
      {rowRenderer}
    </FixedSizeList>
  );
}
✬ Throttling & Debouncing
The number of times an event handler is invoked in a particular time limit is known as the trigger rate. Mouse clicks, on average, have lower event trigger rates than scrolling and mouseover. Higher event trigger rates can cause your program to crash, but there are workarounds. Determine which event handler is performing the costly work. An XHR request or DOM manipulation that produces UI modifications, for example, processes a lot of data, or a calculation event task. Throttling and debouncing strategies can help in these situations without requiring any changes to the event listener.
Throttling
In an essence, throttle involves postponing the execution of a function. When an event is triggered, instead of instantly executing the event handler/function, you’ll add a few milliseconds of delay. When implementing limitless scrolling, this can be used. You can, for example, defer the XHR call rather than fetching the next result set as the user scrolls. Throttling can be done in a variety of ways. You can set a limit based on the number of events that are triggered or the delay event handler that is being used.
Debouncing
Debouncing is a strategy for preventing the event trigger from firing too frequently. If you’re using Lodash, you can use the debounce function to wrap the function you want.
Let’s use an example to better grasp this.
import debounce from "lodash/debounce";
function SearchComments() {
  const [search, setSearch] = useState("");
  const handleSearch = debounce((e) => {
    setSearch(e.target.value);
  }, 1000);
  return (
    <>
      <h1>Search Comments</h1> <input type="text" value={search} onChange={handleSearch} />
    </>
  );
}
export default SearchComments;
✬ Multiple Chunk Files
Your application will always start with a few elements. You can quickly add new features and dependencies to your system. It’ll result in a massive production file. Consider utilizing CommonsChunkplugin for webpack to segregate your vendor or third-party library code from your application code, resulting in two different files. Vendor.bundle.js and app.bundle.js are the two files you’ll end up with. The browser caches these files less frequently and retrieves resources in parallel, reducing load time.
✬ Use React. Memo
React. memo is a great way of React js Performance Optimization as it helps cache functional components.
Memoization is a technique for speeding up computer programs by caching the results of expensive function calls and returning the cached result when the identical inputs are encountered again.
So how does it work? When a function is rendered using this technique it will save the result in memory, and the next time the function with the same argument is called it provides the saved result saving bandwidth.
In React, functions are functional components, and arguments are props. Let’s understand it better with an example. So, how does it function? When a function is rendered using this technique, the result is preserved in memory, and the saved result is returned the next time the function with the same parameter is invoked, conserving bandwidth.
Arguments are props in React, while functions are functional components. Let’s look at an example to help us grasp it better.
import React from 'react';
const MyComponent = React.memo(props => {/* render only if the props changed */});
React. Memo is a higher-order component and it’s like React. Pure Component but for using function components instead of classes
✬ Use React. Suspense
React’s Suspense component allows you to lazy load components to improve performance. Components are loaded dynamically when they are rendered rather than upfront. For example:
AsyncBlogPost.js
const AsyncBlogPost = React.lazy(() => import('./BlogPost'));
App.js
<Suspense fallback={<Spinner/>}>
 <AsyncBlogPost postId={1}/>
</Suspense>
The Suspense component will display the fallback Spinner component until the AsyncBlogPost is loaded. This prevents having to load all components up front.
✬ Conditional Rendering
Conditional rendering is a fundamental concept in react that allows you to dynamically control which JSX elements are displayed on the screen based on certain conditions. This empowers you to create flexible and user-centric UIs that adapt to different situations. You can achieve this with a few simple tricks:

Logical AND Operator (&&)
Imagine this as a shortcut. If the condition on the left (such as checking if someone is logged in) is true, react displays the one on the right (such as a welcome message). Otherwise, nothing shows.
Ternary Operators
You can say that this is the fancy name for the short if-else. These operators are useful for showing different messages based on the condition. Ternary Operators let’s you write the quick if-else statement right in your JSX.
IF Operators
Don’t want to use anything fancy? Wanna be the same old school? Don’t worry! You can absolutely use the good old IF operator. When things get more complicated and you feel like you need more control over things. Go for this option.
✬ Use Call back
Callbacks are an effective strategy for deferring expensive computations in React components until they are required. This prevents wasted work in scenarios where the component may not even render. A common pattern is to wrap the expensive operation in a function that accepts a callback. The computation is then run asynchronously, and the callback is invoked when it completes:
  // PostStats.js

 const PostStats = ({post}) => {

   const [stats, setStats] = useState({});

   useEffect(() => {
     getPostStats(post.id, stats => {
       setStats(stats);
     });
   }, [post.id]);

   // render stats
 }

 // Utils.js
 const getPostStats = (id, callback) => {

   // Simulate async operation
   setTimeout(() => {
     const stats = {
       views: 1000,
       likes: 200
     };

     callback(stats);
   }, 1000);

 }
With this approach, getPostStats will not execute until PostStats mounts and calls the function. The callback allows passing the result back to the component asynchronously. This pattern applies for any costly computations like API calls or intense calculations. Deferring work until needed often optimizes performance.
✬ Avoid Inline Function Definition
The inline function will always fail the prop diff when React conducts a diff check since functions are objects in JavaScript ( {} ! = {} ). Also, if an array function is used in a JSX property, it will produce a new instance of the function on each render. The garbage collector may have a lot of work on his hands as a result of this.
function CommentList( ) {
  const [comments, setComments] = useState([ ]);
  const [selectedCommentId, setSelectedCommentId] = useState(" ");

  return comments.map((comment) => {
    return (
      <Comment
        onClick={(e) => setSelectedCommentId(comment.id)}
        comment={comment}
        id={comment.id}
        key={comment.id}
      />
    );
  });
}
export default CommentList;
Instead of defining the inline function for props, you can define the arrow function
function CommentList ( ) {
  const [comments, setComments] = useState ([ ]);
  const [selectedCommentId, setSelectedCommentId] = useState(" ");
  function onCommentClick(e) {
    setSelectedCommentId(e.target.id);
  }
  return comments.map((comment) => {
    return (
      <Comment
        onClick={onCommentClick}
        comment={comment}
        id={comment.id}
        key={comment.id}
      />
    );
  });
}
export default CommentList;
✬ Handle CPU Extensive Tasks
When dealing with complex calculations or CPU heavy operations, avoid performing the work directly in render. This can block the main thread and cause jank. Instead, offload the work to web workers or break it into chunks using setTimeout or requestIdleCallback:
// ExpensiveCalc.js
const ExpensiveCalc = ({ data }) => {
	const [result, setResult] = useState(null);
	useEffect(() => {
		const chunks = [];
		// Break into chunks
		for (let i = 0; i < 10000; i++) {
			chunks.push(doChunkOfWork(data));
		}
		// Process separately
		for (let chunk of chunks) {
			setTimeout(() => {
				// Compute chunk
			});
		}
		// Final result
		setResult(finalValue);
	}, [data]);
	return <ResultDisplay result={result} />;
};
✬ Server-side Rendering
React Server-side rendering involves the server generating the initial HTML content of a web page, including fetched data, on the server-side before sending it to the browser. This improves SEO, offers faster initial load times, and enhances user experience, especially for slower connections. This server-side rendering allows the page to load faster, showing content immediately without waiting for JS. Let’s understand it better with the example. In this server-side rendering example, we have taken the example of ecommerce site on next.js. You can find more about the server-side rendering and the example here.

Amplify Your In-House Expertise with
Aglowid’s Seasoned ReactJS Specialists
Loading Performance List
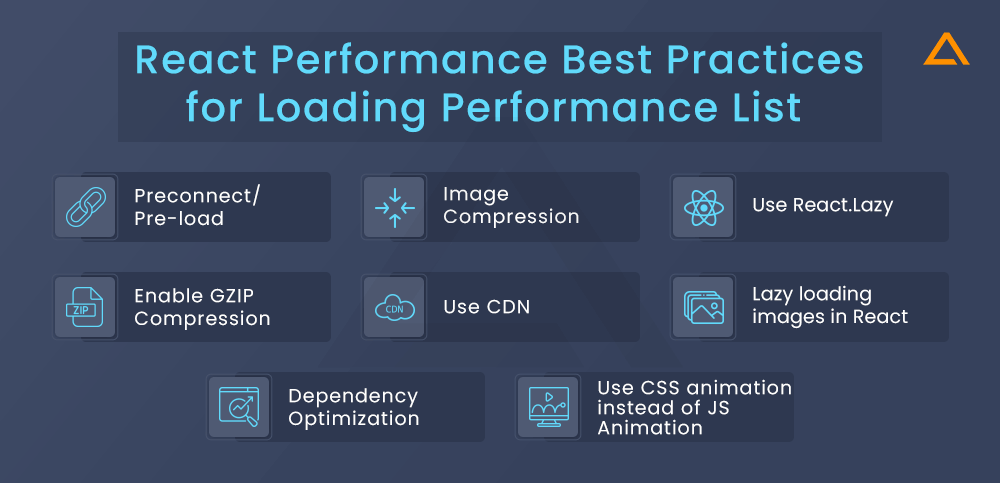
Here are the best practices for optimizing React performance within the loading performance list.
✬ Preconnect/Pre-load
Preconnecting to essential third-party domains and preloading critical resources such as fonts, stylesheets, scripts help reduce the latency for subsequent requests. Similarly, you can also preload critical assets such as images, videos or other such data sources that are essential to the initial user experience. Here’s a brief overview of how they work –
- Preconnect: Preconnect allows browsers to set up early connections for importing third-party origins like CDN or other external services, before an actual HTTP request gets initiated. This helps reduce latency for the subsequent requests by eliminating the need for DNS lookup, TCP handshake and TLS negotiation overhead.
- Preload: Preloading involves fetching and caching resources that are neeeded for the current navigation or upcoming page interactions. This includes assets like fonts, scripts, stylesheets and even images. You need to specify these resources in the HTML document with the <“link rel=preload”> tag, to tell the browser to prioritize fetching and caching them, much before they are needed.
✬ Image Compression (TinyPNG)
Image compression is the bread and butter of website optimization irrespective of what technology or platform you’re using. And hence it is a notable and must-have pointer in our React performance optimization checklist too. It is the technique to reduce image file sizes significantly without a very apparent loss in visual quality. Tiny PNG is a popular tool for compressing PNG and JPEG images effectively. You can use other tools if you’d like, but we’d recommend sticking to one of the most reliable compressors out there.
✬ Enable GZIP Compression
The web server can give a reduced file size by using Gzip compression, which means your website will load faster. Because JavaScript, CSS, and HTML files include a lot of repeating text with a lot of whitespaces, gzip works exceptionally well. Because gzip compresses common strings, it can reduce the size of pages and stylesheets by up to 70%, resulting in faster initial rendering. It is important to understand that you can also do compression when you add the manual script with the 3rd party package. Apart from it you can also do it with webpack using the compression plugin. Let’s understand it better with the example. Here we are taking an example of using the webpack.
If you are using webpack then you can use `compression-webpack-plugin` package for compressing
const CompressionPlugin = require("compression-webpack-plugin");
module.exports = {plugins: [new CompressionPlugin()]};
✬ Use CDN
A CDN is a terrific way to provide static information swiftly and efficiently from your website or mobile application to your audience. The “edge server” is the closest user request server, depending on the geolocation. The user is connected to the edge server when they request material from your website, which is supplied through a CDN, and they are guaranteed the best online experience.
These are some of the most effective CDN providers on the market. CloudFront, CloudFare, Akamai, MAXCDN, Google Cloud CDN, and others are examples. You can also host your static content on CDN using Nelilfy or Sugre.sh. Surge is a free CLI tool that automatically deploys your static project to a high-performance CDN.
✬ Use React.Lazy
Lazy loading is a great technique for react performance improvements. The basic idea of lazy loading is to load the component when it’s needed. React comes bundled with React. lazy API so that you can render a dynamic import as a regular component. Here instead of loading your regular component like :
import LazyComponent from './LazyComponent';
You can cut down the risk by using the lazy method to render the component
const LazyComponent = React.lazy(() => import('./LazyComponent'));
React. lazy takes a function that must call a dynamic import(). This will return a promise which resolves to a module with default export containing a react component
The lazy component should be rendered inside a suspense component, which allows you to add fallback content as a loading state while waiting for the lazy component to load.
import React, { Suspense } from "react";
const LazyComponent = React.lazy(() => import("./LazyComponent"));
function MyComponent() {
  return (
    <div>
      <Suspense fallback={<div>Loading....</div>}>
        <LazyComponent />
      </Suspense>
    </div>
  );
}
✬ Dependency Optimization
It’s good analyzing how much code you’re using from dependencies while trying to Optimize react app bundle size. You may, for example, be using Moment.js, which offers multi-language localized files. If you don’t need to support several languages, you can remove unnecessary locales from the final bundle with the moment-locales-webpack-plugin.
Let’s take the case of loadash, where you’re only using 20 of the 100+ methods available. Having all those other approaches isn’t ideal in that case. You may do this by removing unneeded functions with the loadash-webpack-plugin.
From here, you can download the list of dependencies you can optimize.
✬ Use CSS animation instead of JS Animation
Animations are inevitable for fluid and pleasurable user experiences. There are many ways to implement web animations. Generally, animations are created in three ways:
- CSS Transitions
- CSS animations
- Javascript
Which one is chosen depends on the type of animation we want to add.
When to use CSS -based animation
- To add “one-shot” transitions like toggling UI elements state
- For smaller, self-contained states of UI elements
When to use JavaScript-Based animation
- When you want to have advanced effects
- You need significant control over the animation
- Need to trigger animation, like mouseover, etc
- When using requestAnimationFrame for visual changes
✬ Lazy loading images in react
The react-lazyload library allows deferring image loading until they are visible in the viewport. First install:
npm install react-lazyload
Then import and use the LazyLoad component:
import LazyLoad from 'react-lazyload';
   const MyComponent = () => (
   <LazyLoad height={200} offset={100}>
     <img src="https://aglowiditsolutions.com/wp-content/uploads/2023/10/web-developers-cta.png" />
   </LazyLoad>
);Things to consider before Optimizing your React Performance
Before diving right into how to optimize your React performance, you should first take a step back and understand what is causing your React app performance to lag so much. Moreover, optimizing React app shouldn’t be only limited to times when your app starts malfunctioning; it should be a continuous effort to improve your React app performance. Here are certain things to pay attention to before you start optimizing your React app:

What are your current React Performance Bottlenecks?
First step towards any successful performance improvement is to identify the bottlenecks and challenges of React app performance. Luckily, many React developer performance monitoring tools like Profiler allow developers to gauge their React apps’ performance. Profiler will enable developers to record the time a component takes to render. It also helps understand why a component renders and how other components interact. Such insights will help you get a clearer picture of your React app’s current state, which will help you devise a performance optimization method later.
Which React Component do I need to Optimize first?
First step towards any successful performance improvement is to identify the bottlenecks and challenges of React app performance. Luckily, many React developer performance monitoring tools like Profiler allow developers to gauge their React apps’ performance. Profiler will enable developers to record the time a component takes to render. It also helps understand why a component renders and how other components interact. Such insights will help you get a clearer picture of your React app’s current state, which will help you devise a performance optimization method later.
When should React update the Component?
React’s default behaviour is to run and render the virtual DOM, compare the current DOM with the previous DOM, check for any differences in every component in their props or state, and then re-render the DOM to make those changes. This is not an issue when your React app is small or lacks many components. However, when your app grows in size, re-rendering your React app after comparing it with the entire Virtual DOM for each action will dramatically slow down its performance.
To workaround, this issue, React provides a way for developers to set which component needs re-rendering. It is known as the shouldComponentUpdate method.
function shouldComponentUpdate(nextProps, nextState) {
  return true;
}
If the value for this method returns true, it triggers the render-diff process. Now you can control the render-diff method and set which components you don’t want to re-render. You only need to return a false value from the above function to do so. You can compare the current and next state and props to check if they need re-rendering or not.
function shouldComponentUpdate(nextProps, nextState) {
  return nextProps.id !== this.props.id;
}
What are the common react performance issues?
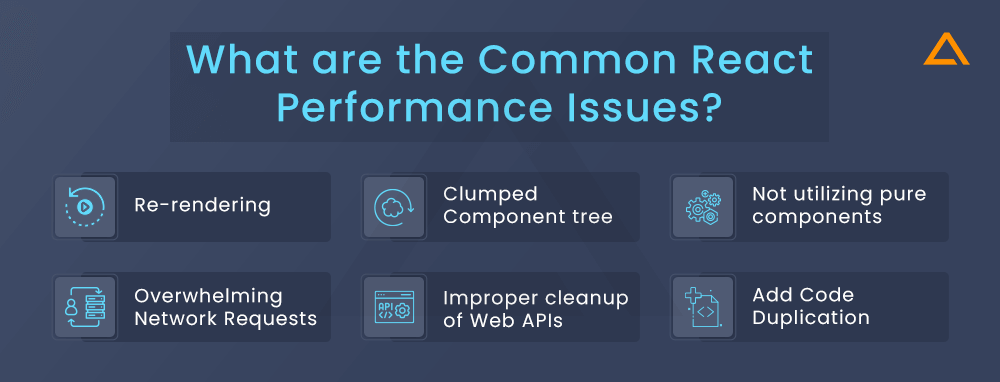
Until you launch your React application on additional environments, performance issues can be hidden. You can find optimization techniques in the following sections if you think any of the following are affecting your React app. The following three performance problems are typical:
Re-rendering
A component in your app is re-rendering code when modified at run-time without modifying the original code. Re-rendering can cause performance issues across all different components.
Clumped Component tree
When components are grouped, the overall app performance can decline. The best practice is to place commonly updated regions into their own, isolated components.
Not utilizing pure components
A pure component only re-renders if the props are different when react compares the previous prop state to the current state.
Now that we have seen some of the react performance tips. Let’s take a look at some of the tools to improve react performance.
Overwhelming Network Requests
Excessive requests in React apps can cause delays and slower rendering times. Techniques such as request throttling and payload optimization can help manage the issue, ensuring smoother performance.
Improper cleanup of Web APIs
It is one of the most undetectable React performance optimization challenges. Most often developers forget to clean up the Web API resoruces like event listeners which can then lead to memory leaks and performance degradation.
Now that we have seen some of the react performance tips. Let’s take a look at some of the tools to improve react performance.
Code duplication
Code duplication is a serious problem in React apps since it results in duplicated functionality, resource waste, and slower app loads. Additionally, redundant code leads to duplicate UI update logic that might not be streamlined, resulting in pointless DOM manipulations and re-renders. This not only affects the performance but also leads to increased code complexity and hiccups in maintain the code.
Tools for Improving React Performance
After getting better insights into your existing React app, you should understand how to utilize some of the best React performance optimization tools that allow developers to monitor their app performance, improve certain aspects of their project and do much more. Here is the top React tools for improving React performance –

Using Performance Tab
When you’re looking into the react performance benchmark in your react application. By default, react includes helpful warnings which turn out to be very helpful during development. However, these warnings make react slower and larger. Make sure to use the production version when you deploy the app.

If you aren’t sure whether your build process is set up correctly, you can check it by correctly, you can check it by installing React Developer’s Tool for Chrome. You can use it to check whether the website is working on React you can see the icon which has a dark background.
React Performance Tools Chrome
You can utilize the Chrome browser’s “Performance” tab to observe how React components mount, update, & unmount while you’re still in development mode, according to React’s instructions. An illustration of Chrome’s “Performance” tab profiling and examining my blog while it is in development mode may be seen in the image below:
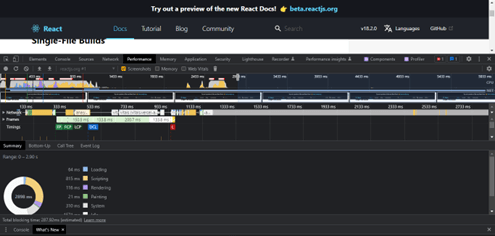
To do this follow these steps:
- Because they can tamper with the analysis result, disable all extensions for a while, especially React Developer Tools. By operating your browser in private mode, you may quickly disable addons
- A development mode of the program must be running. Consequently, the program must be operating locally
- After that, launch the developer tools for Chrome. Press Ctrl + Shift + E to begin recording after selecting the “performance” option
- Use the profile to carry out your desired actions. Less than 20 seconds should be recorded to avoid Chrome hanging
- Stop recording
- The “User Timing” label will be used to group react events
The profiler’s statistics are based on comparisons. In production, rendering speeds for components are often faster. However, this should enable you to determine the depth and frequency of UI updates, as well as when they are made inadvertently.
React Profiler
Profiler is one of the best React performance tools that help developers measure the number of times their components re-render and what resources they utilize for the rendering process. With profiler, you also get a fair estimate of the time it takes for the rendering process. It is an ideal tool for inspecting or detecting performance bottlenecks in the React app.
React Performance Profiling
The documentation for React states that in react-dom 16.5 and react-native 0.57 and later, React Developer Tools Profiler offers increased profiling capabilities in developer mode. The profiler gathers timing data about each displayed component using React’s experimental Profiler API to pinpoint performance problems in a React application. The profiler tool that comes with React Developer Tools may be used when you download it for your browser. Only React v16.5production-profiling +’s build and development modes allow for the use of the profiler
The steps to accomplish this is as follows:
- Download the React Developers Tools
- Ensure that React v16.5+ is installed and running in production-profiling mode or development mode, depending on the case
- Navigate to the “Developer Tools” tab in Chrome. React Developer Tools will offer a brand-new tab called “Profiler,” which will be accessible
- Perform the acts you want to profile before clicking the “Record” button
- Stop recording as soon as you have finished the acts you wish to profile
- Your React app’s event handlers and elements will all be displayed on a graph (called a flame graph)
Bit. dev
Bit is another useful React performance tool for organizing and reusing components. It also makes sharing these reusable components with your teams much easier. The ability to store all performance-optimized React components in an easily accessible yet secure place allows maximum code reusability, speeding up React app performance significantly. Moreover, Bit.dev will enable developers to pick and choose components of a component library without dealing with the entire component library.
Why-did-you-render
Another yet popular React performance optimization tool is why-did-you-render by Welldone Software. Its purpose is to notify the developer about any unnecessary or avoidable re-renders in their React or React Native code. Moreover, it can also be used to understand any component’s behavior and why it re-renders.
React Developer Tools
React Developer Tools is React’s official extension that helps significantly in monitoring React performance. One of its most useful features is ‘Highlight Updates,’ also used for tracking re-rendering in your React app. It simply colors the boundaries of any component that gets re-rendered, making it easier for developers to spot any re-rendering activities when improving React performance.
React Performance Best Practices
Let’s look at some of the best practices to keep in mind for react app performance optimization.

Component Interaction
Using excellent tools like React dev tools, you can solve more than 50% of react performance issues in React by examining how your components interacted in your project. However, before figuring out how the components behave, make sure you understand how React works underneath the hood.
RESELECT & Immutable.js
If you’re having trouble with performance in Redux-based React projects, try RESELECT and Immutable.js. Reselect is a basic Redux selector library that may be used to create memorized selectors. Selectors can be defined as functions that retrieve chunks of the Redux state for React components.
Understanding THIS Bending
Ensure proper method binding in components to prevent unnecessary re-renders. By binding to arrow functions or employing class fields, you sidestep repetitive ‘this’ rebinding during each render cycle. This optimization streamlines performance, resulting in a more responsive web application.
Avoid using Index as Key
When looping over arrays to make components, avoid using the index as the key prop. This causes unnecessary re-renders when the array order changes. Use a unique ID instead.
Utilizing Lightweight UI Library
Integrating a lightweight UI library with selective imports, tree shaking, and lazy loading can help reduce the overall application bundle size significantly. Customization for design needs ensures efficient styling, while server-side compatibility improves initial page load times and SEO.
Use React Query
Utilizing React Query offers many performance benefits in React. It optimizes data fetching by providing background updates, caching, and deduplication while reducing network requests significantly. This improves the app’s responsiveness and reduces server load. Additionally, it simplifies state management by centralizing data fetching logic, resulting in a cleaner and more maintainable code.

Cutting Costs but
NOT Cutting Quality
that’s how we roll!
Wrapping Up!
There are various react optimization techniques to improve react performance, such as lazy loading components, avoiding unnecessary renders, and much more. To make the most of the react app, you need to leverage its tools and techniques. A react web app performance lies in the simplicity of its components, and overwhelming the render-diff algorithm can make your app perform poorly and frustratingly. The techniques outlined above are all great ways for you to practice reactjs performance optimization for your application.
FAQs
Optimize React performance through production builds, avoiding unnecessary re-renders, and virtualizing long lists with libraries like react-window.
Key React features for optimization include React.memo for avoiding re-renders, React.PureComponent for shallow prop checking, and immutable data structures to optimize re-rendering.
Optimize React API calls by memoizing requests, limiting frequency of calls, leveraging web workers for parallel requests, and updating data on interval versus on every user event.



 Say
Say