Quick Summary:
For years, React State Management has been a hot topic, but it appears that enterprise apps and their specific needs have gotten little attention. Learn about React state management, why it’s essential, and how to use React hooks state management and Redux to make the most of it in this post.
The most challenging component of any app is managing the state in react. That is why there are so many state management libraries to choose from, and more are being added every day. The most challenging aspect of React applications is managing the state for front-end developers. React alone is not sufficient to handle the complexity of enterprise-level apps, which is why some developers utilize React hooks, and others employ state management libraries like Redux.
Developers of enterprise-level react applications understand how vital the end-user experience is. According to them, state management should be straightforward, extensible, and atomic. React has taken a step in this direction by offering to react state management hooks. One of the main benefits of adopting a state management library is that it can save the component’s state by keeping it in sync, allowing react to have a global state. The component’s state is passed through props whenever a component-based state management library is used. When the state changes, it sends a rendering alert to the components, allowing the application to manage the state in react.
What is React state management?
The React state managment is an essential component of React functions. A built-in object is available in React components. When you keep durable assets between components rendering, the state is contained in data. The difficulty of dealing with many states in a web application service, particularly when utilizing react. For most web development organizations, the js library is a significant roadblock.
A state management tool can be defined as a library (or a combination of libraries) for building a dynamic user interface in javascript applications. It enables developers to design web apps that are both strong and adaptable. In a nutshell, it implements a view of the MVC model that supports all behaviour and events.
While developing a react application, react state management helps you keep your code well organized and assures resilience and diverse reusable features. It simplifies the management of numerous program components.
Also Read: – Best React UI Framework You Should Know In 2024
React state management patterns
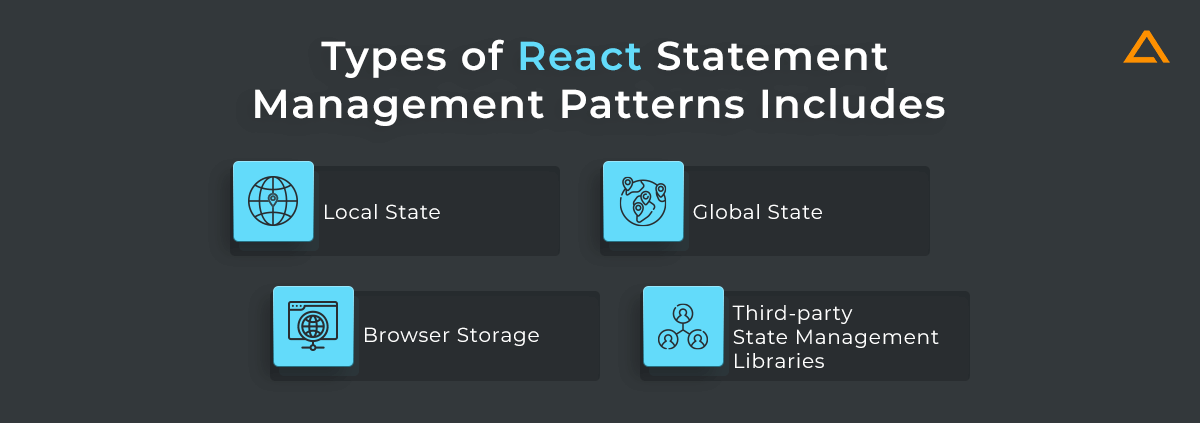
Mainly there are types of react statement management patterns.

Local State
Let’s begin with the most fundamental option: local state. In function components, the estate or useRender hooks define the local state. In React, these hooks provide a way of indicating when the values have changed.
UseState is recommended for the bulk of your states. For complex states, consider using useReducer or another third-party solution. State transitions declared using useReducer or tools such as xState can be checked separately. These methods are advantageous when numerous components share the state since the local state can be passed down to the child component. The local storage has been divided into two sections to make things easier to grasp. Context API and default hooks. Let’s look at each of them in more detail.
Context
Props convey data from the top to the bottom of a React app. However, specific props, such as the locale and frontend theme, should be shared because many components require them within an application. Context allows components to share values like these without having to pass a prop through each tree level directly. Context is used to exchange data among react component trees that can be deemed “global,” such as the current authorized user, theme, or desired language. For example, in the code below, we send a “theme” prop to the button component’s style:
class App extends React.Component {
  render() {
    return <Toolbar theme="dark" />;
  }
}
function Toolbar(props) {
// The Toolbar component must have an additional prop "theme."
// and pass it to ThemedButton. This can be laborious
//if every button in the app needs to know the theme,
//because it would have to pass through all the components.
  return (
    <div>
      <ThemedButton theme={props.theme} />
    </div>
  );
}
class ThemedButton extends React.Component {
  render() {
    return <Button theme={this.props.theme} />;
  }
}
You can avoid passing props across intermediate components by using context.
// Context allows us to pass a value deep into the component tree
//without explicitly passing it through each component.
//Create a Context for the current theme (with "light" as the default value).
const ThemeContext = React.createContext('light');
class App extends React.Component {
  render() {
    // Use a Provider to pass the current theme to the tree below.
   // Any component can read it, no matter how deep it is.
  // In this example, we are passing "dark" as the current value.
 return (
      <ThemeContext.Provider value="dark">
        <Toolbar />
      </ThemeContext.Provider>
    );
  }
}
// A component in the middle does not have to
// pass the topic down explicitly.
function Toolbar() {
  return (
    <div>
      <ThemedButton />
    </div>
  );
}
class ThemedButton extends React.Component {
  // Assign a contextType to read the context of the current topic.
  // React will find the closest parent Provider and use its value.
  // In this example, the current theme is "dark".  static contextType = ThemeContext;
  render() {
    return <Button theme={this.context} />;
  }
}
There are 5 APIs used in the context.
- React.createContext
- Context.Provider
- Class.contextType
- Context.Consumer
- Context.displayName

1. React.createContext
const MyContext = React.createContext(defaultValue);
To begin, make a Context object. React will read the current context value of the Provider closest to it in the tree when rendering a component that subscribes to this Context object. When a component does not have a Providersuperior in the tree, the argument defaultValue is utilized. This default value is helpful for testing components without containing them in a container.
2. Context Provider
<MyContext.Provider value={/* algún valor */}>
A provider react component arrives with each context object, allowing components that consume it to subscribe to changes in the context. The component accepts a prop value, provided to consuming components that are descendants of the provider. Many consumers can be linked to a single provider. To override values farther down the tree, the providers can be nested. All descendants of a provider are not rendered every time the provider’s prop value changes. The function shouldComponentUpdate does not apply to provider propagation to descendant consumers; therefore, the consumer gets updated even if a parent component blocks it. The new and odd values are compared using the same algorithm as Object. is to determine the changes.
3. Class.contextType
class MyClass extends React.Component {
  componentDidMount() {
    let value = this.context;
    /* realiza un efecto secundario en el montaje utilizando el valor de MyContext */
  }
  componentDidUpdate() {
    let value = this.context;
    /* ... */
  }
  componentWillUnmount() {
    let value = this.context;
    /* ... */
  }
  render() {
    let value = this.context;
    /* renderiza algo basado en el valor de MyContext */
  }
}
MyClass.contextType = MyContext;
A Context object created by React can be assigned to the contextType property in a class. createContext(). This property allows you to get the closest current value of that Context by using this. context. Any of the lifecycle methods, including the render function, can refer to it. You can only subscribe to a single context using this API
class MyClass extends React.Component {
  static contextType = MyContext;
  render() {
    let value = this.context;
    /* renderiza algo basado en el valor */
  }
}
4. Context.Customer
<MyContext.Consumer>
  {value => /* render something based on the context value*/}
</MyContext.Consumer>
A context-switching-aware React component. You can subscribe to a context with function components by using this component. It is necessary to do a child-like function. The current context value is passed to this function, returning a React node. The prop value of the closest provider for this context in the tree will be used as the argument value supplied to the function. If this context has no superior provider, the argument value will be the default value supplied to the createContext method ().
5. Context.displayName
The context object accepts a string property displayName. The React development tools use this string to determine what to display for the Context.
For example, the component below will appear as “DisplayName” in the developer tools:
const MyContext = React.createContext(/* some value */);
MyContext.displayName = 'Nessi';
<MyContext.Provider> // " Nessi.Provider” in the development tools
<MyContext.Consumer> // " Nessi.Consumer" in the developer tools
Also Read: – React SEO Guide
Now that we have seen the react context. Lets take a look at the React hooks in state management
LookinG for React developers to hire?
Get in touch to develop highly scalable web app project.
React State Management With Hooks
The React hook APIs were first introduced in October of 2018. They offer an alternative to developing class-based components and a different approach to state management and lifecycle functions. Hooks enable functional components to accomplish previously only possible with classes, such as working with React local state, effects, and context via useState, useeffect, and useContext.
UseReducer, useCallback, useMemo, useRef, useImperativeHandle, useLayoutEffect, and useDebugValue are some of the other hooks. React hooks in state management are divided into two parts. The first part is For Class components and For Functional Components.
Before diving into the React hooks, let’s go through a few of the most important rules to remember:
- Hooks should never be called from within a loop, condition, or nested function.
- Hooks should be placed at the top of your component hierarchy.
- Hooks can only be called from React functional components.
- Never use an ordinary function to call a Hook.
- Hooks can communicate with other Hooks.
For class Component
A set state is used for the class component. There is a state connected with each react component. The state of the component can be modified either due to a system-triggered action. When the state of the components changes, React re-renders them in the browser. Before updating any state value, we must first establish the original state configuration. To modify the status of an object, use the setState() method. It verifies that the component has been changed and requests that it be re-rendered.
Syntax for using setState() method.
setState({ stateName : updatedStateValue })
// OR
setState((prevState) => ({
   stateName: prevState.stateName + 1
}))
For Functional components
useState
const [state, setState] = useState(initialState);
useState returns a stateful value with an update function. The returned state (state) during the initial render is the same as the first argument value (initial state). To update the state, the setState function is utilized. It receives a new state value and causes the component to be re-rendered.
setState(newState);
UseState will always return the most recent state after applying modifications throughout successive re-renders.
useEffect
useEffect(didUpdate);
useEffect() takes a function with imperative, potentially effectful code. Inside the main body of a function component, mutations, subscriptions, timers, logging, and other side effects are not permitted. This will result in perplexing problems and UI inconsistencies. Use useEffect instead. After the render is committed to the screen, the function supplied to useEffect will be called. Consider effects to go out of React’s completely functional world and into the imperative one.
Effects are fired after each finished render by default, but you may choose to have them fire only when specified values have changed.
useContext
const value = useContext(MyContext);
Returns the current context value for that context when given a context object. The value assigned to that context determines the current context value. The value prop of the component closest to the calling component in the tree determines the current context value. This Hook will initiate a render with the latest context value supplied to the nearest MyContext.provider above the component when that MyContext provider is updated. Even if an ancestor utilizes React. memo or shouldComponentUpdate, useContext will cause a rerender to start at the component itself.
Remember that the context object must be passed as an argument to useContext:
- Correct: useContext(MyContext)
- Incorrect: useContext(MyContext.Consumer)
- Incorrect: useContext(MyContext.Provider)
When the context value changes, a component calling useContext must always re-render. You can save money by employing memoization if re-rendering the component is too expensive. useReducer. For a detailed understanding of these hooks, refer to The React Hooks API Reference.
useReducer
const [state, dispatch] = useReducer(reducer, initialArg, init);
useReducer is an alternative to useState Accepts (state, action) => newState as a reducer and returns the current state with a dispatch function. (If you’ve used Redux previously, you’ll know what I’m talking about.)
UseReducer is usually recommended over useState when you have complex state logic with multiple sub-values or when the future state is reliant on the previous one. UseReducer lets you enhance efficiency for components that generate deep updates bypassing dispatch down instead of callbacks.
The counterexample from the useState section, updated to use a reducer
const initialState = {count: 0};
function reducer(state, action) {
  switch (action.type) {
    case 'increment':
      return {count: state.count + 1};
    case 'decrement':
      return {count: state.count - 1};
    default:
      throw new Error();
  }
}

function Counter() {
  const [state, dispatch] = useReducer(reducer, initialState);
  return (
    <>
      Count: {state.count}
      <button onClick={() => dispatch({type: 'decrement'})}>-</button>
      <button onClick={() => dispatch({type: 'increment'})}>+</button>
    </>
  );
}
Global State
Consider using the global state if you need to declare data used by your entire program or a big piece of it. React has built-in context support for global states and functions. Child components re-render when the state declared in the context changes. The wonderful thing about context is that you don’t have to send this state down manually. Any component can use the context consumer to subscribe to the state. Redux is a popular and scalable third-party alternative to React’s built-in context for the global state if you don’t want to use React’s built-in context.
Browser Storage (URL state)
It’s crucial not to declare the same state twice. This might result in unnecessary complexity and issues that are out of sync. Consider storing the state in the URL if relevant to the location. Search queries, anchors, deep links, and any other URL states are examples of URL states. The most common library for dealing with URL states currently is React Router.
Third-party state management libraries
Several state management tools may be found on Github. Taking each one into account, on the other hand, would result in a limitless amount of study and comparisons. That’s why, depending on their popularity, usage, and upkeep, the libraries are whittled down to the top three contenders. This is not an exhaustive list, but it does represent the most popular.
Redux
- It created a barrier between the state and the actions.
- The use of react-redux magic allowed for a simple state connection.
- Dan Abramov, a well-known Facebook developer and member of the React core team, is one of the library’s co-creators.

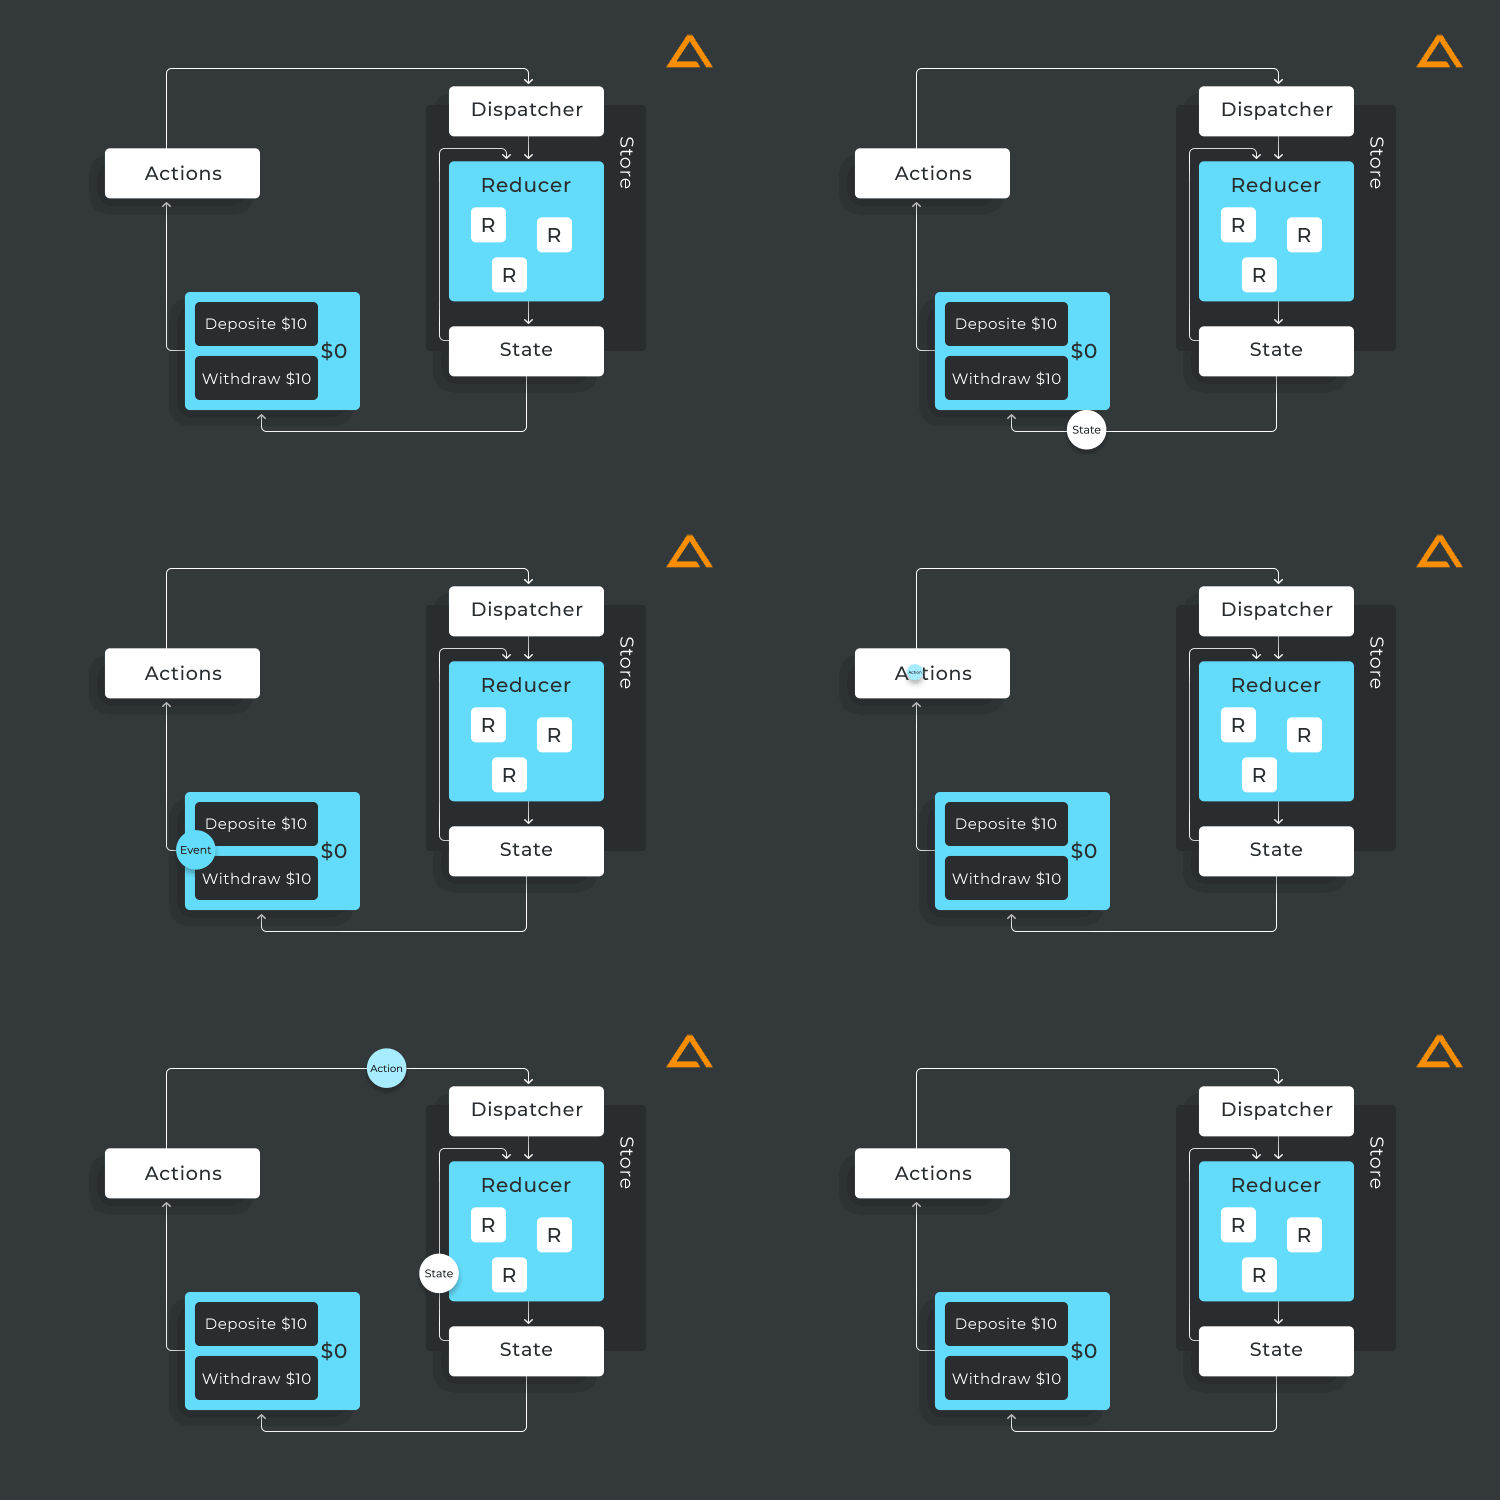
You have a global store where you can store your data. Whenever you need to update the store, you dispatch an action to the reducer. Depending on the action type, the reducer. Depending on the action that goes to the reducer. Depending on the action type, the reducer updates the state in an immutable way. To use Redux with React, you’ll need to subscribe the components to the store updates via react-redux.
Example
// slices/counter.js
import { createSlice } from "@reduxjs/toolkit";

export const slice = createSlice({
  name: "counter",
  initialState: {
    value: 0
  },
  reducers: {
    increment: (state) => {
      state.value += 1;
    },
    decrement: (state) => {
      state.value -= 1;
    }
  }
});

export const actions = slice.actions;
export const reducer = slice.reducer;


// store.js
import { configureStore } from "@reduxjs/toolkit";
import { reducer as counterReducer } from "./slices/counter";

export default configureStore({
  reducer: {
    counter: counterReducer
  }
});


// index.js
import React from 'react'
import ReactDOM from 'react-dom'
import { Provider } from 'react-redux'
import App from './App'
import store from './store'

ReactDOM.render(
  <Provider store={store}>
    <App />
  </Provider>,
  document.getElementById('root')
)

// App.js
import React from "react";
import { useSelector, useDispatch } from "react-redux";
import { actions } from "./slices/counter";

const App = () => {
  const count = useSelector((state) => state.counter.value);
  const dispatch = useDispatch();

  return (
    <div>
      <div>
        <button onClick={() => dispatch(actions.increment())}>Increment</button>
        <span>{count}</span>
        <button onClick={() => dispatch(actions.decrement())}>Decrement</button>
      </div>
    </div>
  );
};

export default App;
Mobx
MObX is a rather old response state management library. On GitHub, it has 24.9K stars and 988K weekly downloads on an open basis. MobX differs from Redux in that it follows the OOP paradigm and uses observables. Michel Weststrate designed it, and a group of open-source enthusiasts now maintains it with the support of Mendix in Boston.

In MobX, you may establish an observable store by calling makeObservable inside a JavaScript class’s function Object(). The class’s properties and methods are then declared. The components subscribe to this observable store to access the state, calculated values, and actions. Another critical aspect of MobX is mutability, which allows you to update the state without causing any side effects.
Example
/ stores/counter.js
import { makeAutoObservable } from "mobx";
class CounterStore {
  value = 0;
  constructor() {
    makeAutoObservable(this);
  }
  increment() {
    this.value += 1;
  }
  decrement() {
    this.value -= 1;
  }
}
export default CounterStore;
// index.js
import React from "react";
import ReactDOM from "react-dom";
import { Provider } from "mobx-react";
import App from "./App";
import CounterStore from "./stores/counter";

ReactDOM.render(
  <Provider counter={new CounterStore()}>
    <App />
  </Provider>,
  document.getElementById("root")
);
// App.js
import React from "react";
import { inject, observer } from "mobx-react";
const App = inject((stores) => ({ counter: stores.counter }))(
  observer(({ counter }) => {
    return (
      <div>
        <div>
          <button onClick={() => counter.increment()}>Increment</button>
          <span>{counter.value}</span>
          <button onClick={() => counter.decrement()}>Decrement</button>
        </div>
      </div>
    );
  })
);
export default App;
Recoil reactjs
The latest react state management library, Reactjs recoil, is pretty young. The fundamental concept is to add missing React capabilities like Shared state and derived data straightforwardly. Furthermore, it’s an entirely new way of communicating state in react. Recoil has Facebook’s support and is one of the most talked-about subjects in the react community.
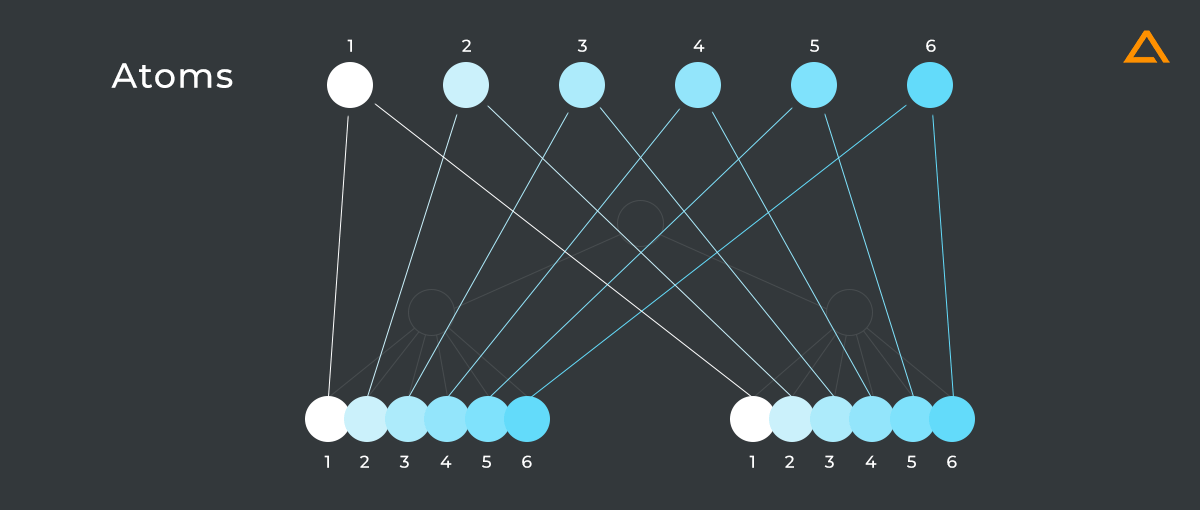
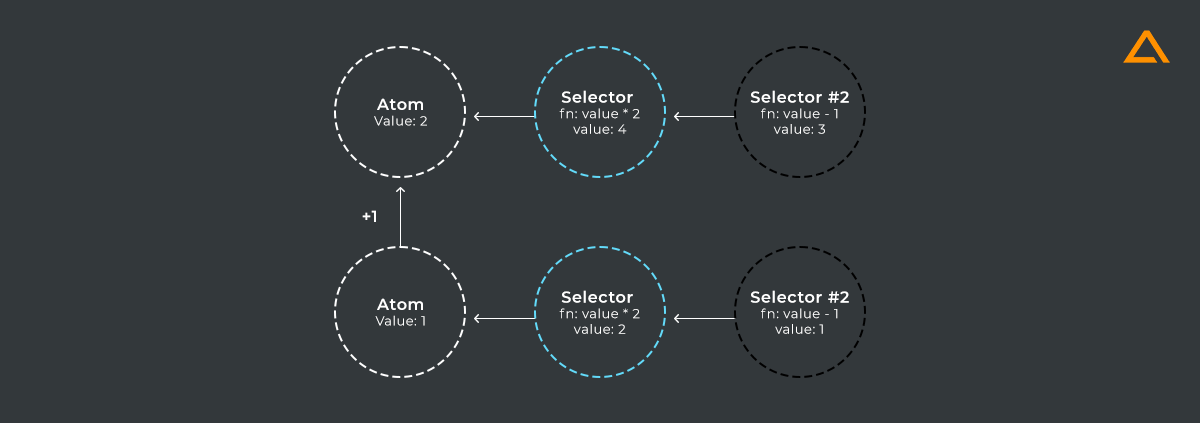
Recoil is based on the concepts of atom and selection. A shared-state piece is an atom. A component can acquire or set the value of an atom by subscribing to it.

As shown in the image, only subscribed components are re-rendered when the value is changed. This allows you to react quickly. The selection is another feature that makes recoil appealing. The value of the selection is derived from an atom or another selector.

Whenever an atom/selector is changed, the selectors that use it (i.e., are subscribed to it) are reevaluated.
Example
// atoms/counter.js
import { atom } from "recoil";
const counterAtom = atom({
  key: "counter",
  default: 0
});
export default counterAtom;
// index.js
import React from "react";
import ReactDOM from "react-dom";
import { RecoilRoot } from "recoil";
import App from "./App";

ReactDOM.render(
  <RecoilRoot>
    <App />
  </RecoilRoot>,
  document.getElementById("root")
);
// App.js
import React from "react";
import { useRecoilState } from "recoil";
import counterAtom from "./atoms/counter";
const App = () => {
  const [count, setCount] = useRecoilState(counterAtom);
  return (
    <div>
      <div>
        <button onClick={() => setCount(count + 1)}>Increment</button>
        <span>{count}</span>
        <button onClick={() => setCount(count - 1)}>Decrement</button>
      </div>
    </div>
  );
};
export default App;
Also Read: – Best React Developer Tools
React state management best practice
Following are some of the react state management best practices to follow
- State management is utilized to mitigate prop drilling.
- You can utilize react state management to update your data after creating/updating it without reloading it.
- It is critical to store your state in the correct location.
- It is advised that you learn different react state management frameworks and Redux.
- Use the principle of single responsibility.
- Custom hooks can be used to store complicated state logic.

have a unique app Idea?
Hire Certified Developers To Build Robust Feature, Rich App And Websites.
Wrapping up!
So those are some of the top react state management libraries to think about in 2024. There are many more libraries like these on Github, and there will be many more in the future. Thus, this list will probably change in a year or less. Despite its widespread adoption, using the best state management for react is not required. State management in react js is difficult, but with these suggestions, you should accomplish it in a productive and readable manner.


