
Quick Summary:
React Design Patterns are core enablers of React library that enable React Developers to create complex React apps in an easily maintainable manner, which are also flexible, deliver better results and drive better performance. Learn how to leverage design patterns in React to optimize your React.js project.
In the ever-evolving landscape of web development, React has emerged as one of the leading technologies to empower developers for building dynamic and interactive user interfaces with unparalleled efficiency. Yet, to master React development and gaining mastery on it, goes beyond just learning the syntax and core concepts, it also requires proper understanding of the power of design patterns in React.
What is Design Pattern in React?
Developers use Design Patterns in React to save development time and reduce coding efforts by applying pre-tested proven solutions to solve common React development problems.

React Design Patterns are used to simplify large React apps, helping reduce considerable stress from your React development team and let them work on separate components and share logic between them.
Benefits of using Component Design Patterns in React
There are many benefits of using React component design patterns. They, not only speed up React development processes but also makes the code easier to maintain and read. Here are different ways design patterns help React developers in their React projects:
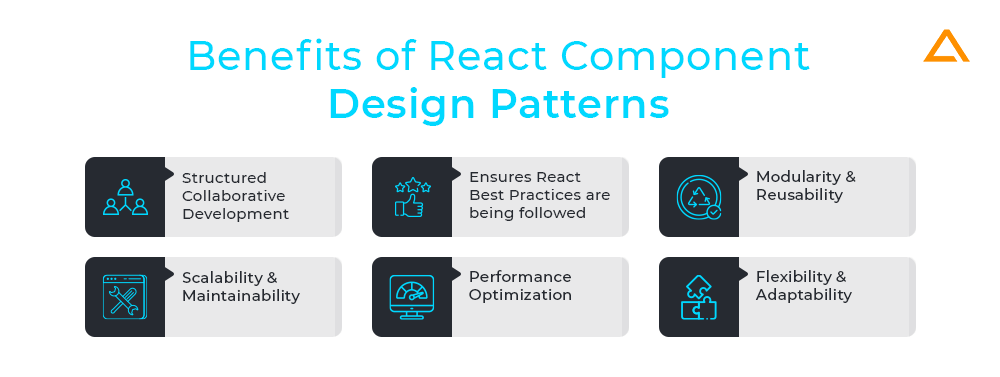
1. Gives structure for collaborative development
React is known for its flexible development environment as it doesn’t impose a set of rules or isn’t opinionated, unlike other popular web app frameworks. Though this opens up endless possibilities for React developers to mix and match different development approaches, it can also work as a limitation when multiple React developers collaborate on a project. Design patterns provide the much-needed structure to your React app developers team or the developers team that you may have hire from ReactJS development company. It provides standard terminology and solutions to common problems. This way, we can ensure all developers know what method to follow to solve a common problem, avoid conflicts or errors in code, and optimize the entire process.
2. Ensures React.js Development Best Practices are being followed
Frameworks only release design Patterns after extensive research and thorough testing. The same is true for React. Hence, design patterns for React not only help ease the development process but also ensure that React developers are following React development best practices. Hence design patterns are a powerful tool at the disposable of React developers enabling them to create unique, robust and scalable apps.
3. Modularity and Reusability
React component design patterns promote the creation of modular, self-contained building blocks. When you encapsulate functionality with discrete components, it promotes reusability and composes them to construct complex user interface.
4. Scalability and Maintainability
As the React application grows in size and complexity, maintaining the codebase can become more demanding and challenging. Utilizing Design Patterns such as Container/Presentational or HOC pattern can help manage this complexity by separation of concerns and responsibilities. This ensures changes in one part of the app doesn’t affect the entire project.
5. Performance Optimization
Design patterns like Memoization or other React design patterns such as Render Props empowers developers to optimize React performance by minimizing unnecessary re-renders and avoiding unrequired computations. By memoizing expensive computations or selectively rendering components based on state changes, applications are able to achieve better runtime, responsiveness and performance.
6. Flexibility and Adaptability
React component design patterns provide a flexible foundation that can adapt to your business’ evolving requirements and changing needs. Whether you want to refactor existing code, add new features, or integrate third-party libraries, adhering to established pattern, ensure your codebase remains resilient and adaptable.
How React Design Patterns help solve cross-Cutting Concerns of React Development?
Since React is such an open platform with many possible solutions to one problem, React has different components that may share common functionality. This is referred to as cross-cutting concerns. Cross-cutting concerns are used across multiple React app modules. They represent functionalities for secondary requirements such as security, logging, data transfer, and other concerns essential to almost every React component. This is why they are also known as system-wide concerns.
React design patterns provide structured and efficient solutions to common cross-cutting concerns in React. Here’s how React design patterns help address these challenges in React –
1. State Management
React design pattern like Flux architecture or libraries like Redux offer organized ways to manage state. By centralizing state management, these patterns make it easier to share state between components, handle complex state interactions and maintain a predictable state flow throughout the application.
2. Routing
Design patterns like the Routing pattern are commonly implemented with libraries like React Router for streamlining navigation in React applications. They provide a declarative way to define routes and associated components, making it easier to manage client-side routing and handling navigation-related concerns.
3. Authentication and Authorization
Some React design patterns allow developers to implement robust authentication and authorization mechanisms. Patterns like Render Props or HOC work on the encapsulation of authentication logic, making it reusable across multiple components. This ensures consistent enforcement of security policies throughout the application.
4. Internationalization and Localisation
React design patterns can help implement React internationalization (i18n) and localization (l10n) features. Patterns like Context API or HOC pattern can be utilized for providing language-specific translations and formats.
5. Error Handling
Design patterns in React like Error Boundaries help isolate and handle errors without affecting the other aspects of the app. It wraps the component with error boundary components, allowing developers to catch the errors occurring within the subtree and displaying fallback UI which helps prevent crashes and improves the overall user experience.
6. Performance Optimization
Implementing React design patterns promotes performance-conscious development practices. Techniques like Memoization implemented through React memo and useMemo hooks can help minimize re-renders and optimize component lifecycles leading to improved performance and responsiveness.
Top React Design Patterns to implement in 2024 for Solving Common React Issues
There are many design patterns for React, and they all help solve many React development problems and challenges. However, it is impossible to cover each of them, and it can be overwhelming to bifurcate the most efficient ones from the rest. Hence, we worked hard for you and curated a list of Advance React Design Patterns you should know and use in 2024. Without further ado, let’s dive right into it:
Most Used React Design Patterns in 2024
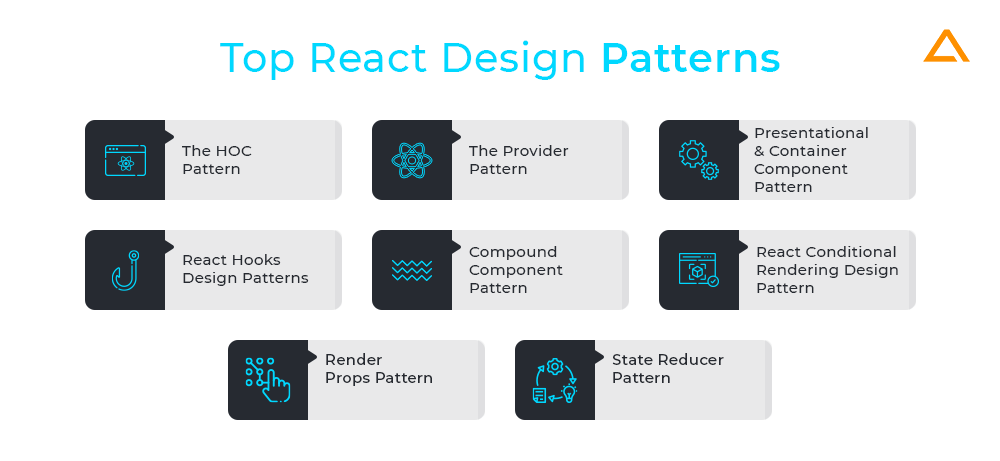
1. The HOC (Higher Order Component) Pattern
Main Purpose: Enables reusability of logic across several components by wrapping them with higher-order components.
If you are an experienced React developer, chances are you would have realized the need to utilize the same logic in various situations such as:
- Components that use Third Party Subscription Data
- Enhance Various Card Views with the same design elements, such as shadow and border
- App Components that require logged in user data
- Situation needing infinite scroll in three different views, all with different data
You can solve all these React cross-cutting concerns with HOC! Higher Order Components is a popular React design pattern used for logic between various components without needing to rewrite the code manually. A HOC is considered a pure function as it has zero side effects.
HOC is a JavaScript function that takes a component as an argument and returns another component after injecting or adding additional data and functionality to the returned component. Higher Order Components’ fundamental concept is based upon React’s nature, which prefers composition over inheritance. Many popular React frameworks use this advanced React pattern like connect from Redux. If you are using React with Redux for your project and you pass your component through connect function, the passed component will get injected with some data from the Redux store, and these values will be passed as Props. You can use the same function ‘connect’ for passing any component to get the same power-up which is access to the Redux store.
React HOC Structure
import React, { Component } from "react";
const higherOrderComponent = (DecoratedComponent) => {
  class HOC extends Component {
    render() {
      return <DecoratedComponent />;
    }
  }
  return HOC;
};
Popular React HOC Integrations to know:
| react-router | withRouter(UserPage) |
| react-redux | connect(mapStateToProps, mapDispatchToProps) (UserPage) |
| material-ui | withStyles(styles)(UserPage) |
2. The Provider Pattern
Main Purpose: Facilitating centralized state management and sharing of data across the component tree using React’s Context API.
The Provider pattern is next on the list of advanced React design patterns used in React. Its purpose is to share global data across various components of the React component tree. React’s Provider Pattern comes with a Provider component which holds the global data, which it can pass down the component tree in the app by using its Consumer component/custom Hook. Again, this pattern can be used with other React integrations such as React-Redux and MobX. To understand how React Provider Design Pattern works, we first need to understand React’s Context API.
How does Provider Design Pattern in React help avoid Prop Drilling?
Prop Drilling is one of the most common React development concerns React developers face. Prop drilling is when the React app data(props) are passed down to two different components until it reaches the component where the prop is required. It becomes a concern when unrelated components share the data through which the props need to be passed down to the actual component that needs the prop. The Provider design pattern Reactjs is a solution to this React concern. It helps developers store the data in a centralized location known as React Context object that uses React Context API and the Redux store. The Context Provider or the Redux Store can pass this data directly to any component that needs it without undergoing props drilling.
React-Redux Provider Design Pattern Structure
import React from 'react'
import ReactDOM from 'react-dom'

import { Provider } from 'react-redux'
import store from './store'

import App from './App.'

const rootElement = document.getElementById('root')
ReactDOM.render(
  <Provider store={store}>
    <App />
  </Provider>,
  rootElement
)
3. Presentational and Container Component Pattern
Main Purpose: Promotes a clear separation of concerns by dividing React applications into presentational components, responsible for UI and container components responsible for data fetching and state management.
The entire idea behind this React design pattern was to find an easier way to reuse your React app components. Presentational and Container Component Pattern works on the belief that it is easier to manage components if they are divided into two buckets – Presentational and Container Components. So, what are the differences between Presentational and Container Component Patterns in React?
| Presentational Components | Container Components |
| Primarily concerned with how things look | Primarily concerned with how things work |
| It might contain both presentational and container components, generally has some DOM markup and styles of their own | It might contain both presentational and container components but doesn’t have any DOM markup and styles of their own |
| No dependencies on the other aspects of the app | Helpful in providing data and behaviour to presentational or other container components |
| Allows containment via this.props.children | Calls Flux actions and provides callbacks to the presentational components |
| Receive data and callbacks exclusively through props | Generally created using HOC like createContainer() from Relay, connect() from React Redux and more |
| Doesn’t mention how the data gets loaded or mutated | Generally, are Stateful as they serve as data sources most times |
| Examples – Sidebar, Page, List, UserInfo | Examples – StoryContainer, FollowedUserList, UserPage, FollowerSidebar |
Presentational Component vs Container Component Code Comparison
Presentational Component
const usersList = ({users}) = {
  return (
  ul
      {users.map((user) = (
      li key={user.id}
          {user.username}
      li
      ))}
  ul
  );
};
Container Component
class Users extends React.Component {
  state = {
    users: []
  };

  componentDidMount() {
    this.fetchUsers();
  }

  render() {
    return (); // ... jsx code with presentation component
  }
}
If you are going to use the Presentational and Container Component design pattern, we’d suggest for you first start building your app with just the presentational components. Doing so will help you assess if you are passing down too many props to the intermediate components that don’t have any use for these props but still need to forward them to the components below them.
When this issue arises, it will as the child component needs access to that data passed as props time, and again, you can introduce container components. Doing so will help you separate the data and the behaviour props to the leaf components without putting a lot of stress on the components that have no use in this data in the middle of the tree.
4. React Hooks Design Patterns
Main Purpose: Simplifies state management and side effect handling in React allowing functional components to use state and lifecycle features previously only available to class components.
Hooks got introduced in React 16.8 version, and they have brought a revolution in how developers approach building React components. Using the React Hook API enables React functional components to get access to common React features like context, state, props, lifecycle and refs. This increases the potential of functional components as they can now perform all tasks that originally were only supported by class components.
Is React Hook a better alternative to Presentational and Container Components Design Patterns?
Now the purpose React hooks serves is similar to Presentational and Container component design patterns, to enable separation of concerns. However, presentational and container pattern generally creates giant components with a massive logic split across different lifecycle methods.
Such components can be difficult to maintain and read. Containers are also classes; hence they cannot be easily composed. Hence when we put functional components on steroids through React hooks, they are able to perform all functions of containers without their limitations. Since they are pure JavaScript functions, functional components in React are easily composable. Using containers also has other class-related problems like auto binding and using this function.
Using container method is generally not optimal because…
import React, { Component } from "react";
class Profile extends Component {
  constructor(props) {
    super(props);
    this.state = {
      loading: false,
      user: {},
    };
  }
  componentDidMount() {
    this.subscribeToOnlineStatus(this.props.id);
    this.updateProfile(this.props.id);
  }
  componentDidUpdate(prevProps) {
    // compariation hell.
    if (prevProps.id !== this.props.id) {
      this.updateProfile(this.props.id);
    }
  }
  componentWillUnmount() {
    this.unSubscribeToOnlineStatus(this.props.id);
  }
  subscribeToOnlineStatus() {
    // subscribe logic
  }
  unSubscribeToOnlineStatus() {
    // unscubscribe logic
  }
  fetchUser(id) {
    // fetch users logic here
  }
  async updateProfile(id) {
    this.setState({ loading: true });
    // fetch users data
    await this.fetchUser(id);
    this.setState({ loading: false });
  }
  render() {
    // ... some jsx
  }
}
export default Profile;- You need to make use of setState() to call props, and it only changes the first level of any state object
- Inline action methods like onHandleChange() adds up many lines of code
- You need to repeat related logic across all lifecycle methods
And in comparison, using React hooks design pattern:
import React, { useState, useEffect } from "react";
function Profile({ id }) {
  const [loading, setLoading] = useState(false);
  const [user, setUser] = useState({});

  // Similar to componentDidMount and componentDidUpdate:
  useEffect(() => {
    updateProfile(id);
    subscribeToOnlineStatus(id);
    return () => {
      unSubscribeToOnlineStatus(id);
    };
  }, [id]);

  const subscribeToOnlineStatus = () => {
    // subscribe logic
  };

  const unSubscribeToOnlineStatus = () => {
    // unsubscribe logic
  };

  const fetchUser = (id) => {
    // fetch user logic here
  };

  const updateProfile = async (id) => {
    setLoading(true);
    // fetch user data
    await fetchUser(id);
    setLoading(false);
  };

  return; // ... jsx logic
}
export default Profile;
- Provides direct access to state
- Allows functional components to use state
- useEffect replaces lifecycle methods like componentDidMount and componentWillInmount, helping developers write and maintain cleaner and concise code
Although popularly, React hooks seem like they have replaced container components; if your app is relatively smaller or medium-sized, or if you don’t want to adapt to React hooks, you can still make use of container component design pattern for your React app.
Looking for React developers to hire?
Get in touch to develop highly scalable web app project
5. Compound Component Pattern
Main Purpose: Allows creation of components that work together as a single unit, providing greater flexibility and customization for users.
One of the common React patterns is React compound component pattern that helps establish seamless communication between a parent and children’s components via a flexible and expressive API. Using this React design pattern, the parent component can interact and share state with the children components implicitly. It provides an effective method for various components to share states and handle logic. Compound components are best suitable for React apps where you need to build declarative UI.
What is a compound component?
Compound component in React is a pattern that encloses the state and behaviour of a group of components while giving the rendering controls of its variables to the external user.
For instance, if we consider <select> and <option> tags in HTML to create a drop-down menu:
<select>
  <option value="USA">USA</option>
  <option value="UK">UK</option>
  <option value="INDIA">INDIA</option>
</select>;
Here, the <select> tag is being used with the <option> tag for creating a drop-down menu for selecting items from a list in HTML. If we observe, here, the <select> tag is handling the state of the UI, and the <option> tags are set as per how the <select> element should work.
Next, we should look at an example where we build a custom React select component with a list of options where the user can select one option at a time:
Basic React List Code Example
const Option = ({ children, onClick, active }) => {
  return (
    <div
      style={
        active ? { backgroundColor: "grey" } : { backgroundColor: "white" }
      }
      onClick={onClick}
    >
      <p>{children}</p>
    </div>
  );
};

const Select = ({ options }) => {
  const [selectedOption, setSelectedOption] = useState(null);

  return options.map(({ key, value }) => (
    <Option
      active={selectedOption === key}
      onClick={() => setSelectedOption(value)}
    >
      {key}
    </Option>
  ));
};

const App = () => (
  <Select
    options={[
      { key: "Oliver", value: "oliver" },
      { key: "Eve", value: "eve" },
    ]}
  />
);
There are a few issues that need to be addressed here –
- In this code example, select and option are two independent components. This means that we can make use of the options component without the select component, which is not what we want, as options should be a part of the select menu
- Another issue with this approach is Prop Drilling. As you can see, we are passing props through many levels here. The App component here has no need to know about the options. Only the Select component should handle the Option state and behaviour.
React compound component best practices –
Now that we know the issues with this method, we need to ensure:
- Options are only used in the scope of a Select menu
- State and behaviour are being directly managed by Select component
- Should have provisions for static options
Solving this issue with React Context API + Compound Component Design Pattern
import React, { useState, useContext } from "react";

const SelectContext = React.createContext();

const Select = ({ children }) => {
  const [activeOption, setActiveOption] = useState(null);

  return (
    <SelectContext.Provider value={{ activeOption, setActiveOption }}>
      {children}
    </SelectContext.Provider>
  );
};

const Option = ({ key, children }) => {
  const { activeOption, setActiveOption } = useContext(DropDownContext);

  if (!activeOption || !setActiveOption) {
    throw new Error(
      "Context is undefined. Option should be used within the scope of a Select component!!"
    );
    return (
      <p>Option should be used within the scope of a Select component!!</p>
    );
  }

  return (
    <div
      style={
        activeOption === key
          ? { backgroundColor: "grey" }
          : { backgroundColor: "white" }
      }
      onClick={() => setActiveOption(key)}
    >
      <p>{children}</p>
    </div>
  );
};

Select.Option = Option;

export default function App() {
  return (
    <Select>
      <Select.Option key="oliver">Oliver</Select.Option>
      <Select.Option key="eve">Eve</Select.Option>
    </Select>
  );
}
You will notice the code differences here compared to our previous code example.
- For instance, now the select component has become a compound component. There are multiple components which are sharing state and behaviour under it
- We coupled the Option component with Select by using Select.Option = Option. Now we only need to import the Select component, and the Options component would import with it automatically
- Now, since we coupled the Option component inside Select, if we render it outside the Select option, it will show an error since the context is not defined for that case
- We can also add a line break now without having to pass a prop
Only use Compound Components when:
- The child components are required to be inside the scope of a parent component, and they need to share behaviour and state
- You need to render a user interface based on static data that is provided beforehand
6. React Conditional Rendering Design Pattern
Main Purpose: Dynamic rendering of React components and UI elements based on certain conditions or states, enhancing the interactivity and responsiveness of React applications.
For any React app, there are many instances where developers need to render elements based on certain conditions for creating React screens. This React Design pattern can be used at various instances of your React app based on your needs. A practical example of React conditional rendering will be if we need to integrate an authentication option in our React app. For instance, if we are providing an authentication option, we need to make a ‘log out’ button that remains visible when the user is Logged In to the app and a Login/SignUp button for when the user is signed out or is visiting the app for the first time. This process of rendering UI elements for specific conditions or executing logic is known as a conditional rendering design pattern in React.
Conditional Rendering in React using If
One of the most basic conditional rendering logic used in React is using an if statement. This type of conditional rendering is used when we want to render some element only when one specific condition is passed.
For instance, you have something that you don’t want to render in your React component as it doesn’t have the required props ready. A perfect example of this will be a React component list, which shouldn’t render the HTML elements in view if the list of items is missing or absent in the first place. We can set this conditional rendering using a simple JavaScript statement for returning the app to the previous state.
const users = [
  { id: "1", firstName: "Robin", lastName: "Wieruch" },
  { id: "2", firstName: "Dennis", lastName: "Wieruch" },
];

function App() {
  return (
    <div>
      <h1>Hello Conditional Rendering</h1>
      <List list={users} />
    </div>
  );
}

function List({ list }) {
  if (!list) {
    return null;
  }

  return (
    <ul>
      {list.map((item) => (
        <Item key={item.id} item={item} />
      ))}
    </ul>
  );
}

function Item({ item }) {
  return (
    <li>
      {item.firstName} {item.lastName}
    </li>
  );
}
Now, if the information passed from props will be undefined or null, the components will return null in conditional rendering. Hence, a react component returning a null value instead of JSX renders nothing.
Conditional Rendering in React using If/else
Suppose/else is one of the most popular conditional rendering methods in React Design Patterns. It is ideal for situations where developers need to execute more than a single line of code inside if or else block or outside the scope of JSX.
For instance, you need to set and define accessibility features of different users based on their roles:
if (userProfile.role === "superadmin") {
  initSuperAdminFunction();
  initSuperAdminComponent();
  // other block of codes;
} else if (userProfile.role === "admin") {
  initAdminFunction();
  initAdminComponent();
  // other block of codes;
} else {
  initUserComponent();
  // other block of codes;
}
React Design Pattern If/else Best Practices:
- Using it anywhere outside JSX markup
- For places where you need to execute multiple lines of codes inside the if-else block
Conditional Rendering in React using Ternary Operator
Ternary Operator is nothing else but kind of a shortcut for the if/else conditional rendering design pattern. Using a ternary operator can enable developers to write the conditional rendering inline or in a single line of code.
For instance, lets see how ternary operator would help assigning variable values:
// Conditional rendering with common if else
let isDrinkTea;
if (role === "developer") {
  isDrinkTea = true;
} else {
  isDrinkTea = false;
}
// Conditional rendering with ternary operator
let isDrinkTea = role === "developer" ? true : false;
Now the same example can be continued with a function for return value:
// Conditional rendering with common if else
function isDrinkTea(role) {
  if (role === "developer") {
    return true;
  } else {
    return false;
  }
}
// Conditional rendering with ternary operator
function isDrinkTea(role) {
  return role === "developer" ? true : false;
}
In the code above, we compared setting the conditional rendering with if/else vs setting it with the ternary operator. You can clearly see the difference, as we could set the same logic in one line with the Ternary operator.
React Design Pattern Ternary Best Practices
- Used for assigning value for a function return or a conditional variable value
- Used for cases where developers want to only execute a single line of code
- It can be used for conditional rendering in JSX
Conditional Rendering in React using && operator
So far, we understood how to use the if function, if/else function and how to reduce the code length of the if/else statement with the ternary operator. However, there is a simpler alternative to using the ternary operator. You can make use of a short-circuit AND operator for replacing a ternary operator like:
 Instead of using the ternary operator,
{
  isShow  SmallComponent   null;
}

We can use short-circuit && operator
{
  isShow && SmallComponent ;
}
For the ternary operator, when there is no value assigned to the ‘else’ condition, you need to write the ‘: null’ expression to avoid an error. When using short-circuit && operator, we don’t need to write a null expression.
Note: You cannot replace if/else or if-else if-else statement with short circuit && operator.
React Design Pattern Short-Circuit && Best Practices
- Used for simple conditional rendering, no code needs to be executed in the ‘else’ block
Conditional Rendering in React using Switch Case
React also has a switch/case statement, another conditional operator often used as an alternative to if/else statements. However, the use case for this is a little different.
For instance, if you are working on a blogging app and you need to display different layouts for differ user roles:
function App(props) {
  const { role } = props;
  if (role === "author") {
    return <AuthorLayout>Let’s write something</AuthorLayout>;
  }
  if (role === "admin") {
    return <AdminLayout>Here are the latest reports </AdminLayout>;
  }
  if (role === "moderator") {
    return <ModeratorLayout>These are the ongoing events</ModeratorLayout>;
  }
  return <GuestLayout>Your current feed</GuestLayout>;
}
The above code can be refactored using switch/case statement like:
function App(props) {
  const { role } = props;
  switch (role) {
    case "author":
      return <AuthorLayout> Let’s write something </AuthorLayout>;
    case "admin":
      return <AdminLayout> Here are the latest reports </AdminLayout>;
    case "moderator":
      return <ModeratorLayout> These are the ongoing events </ModeratorLayout>;
    default:
      return <GuestLayout>Your current feed</GuestLayout>;
  }
}
If we compare the two codes here, you can see in the JavaScript function you need to repeatedly use the break statement, whereas React component has the return statement to stop the switch operation.
However, if you wish to use switch without return, you will need to use break statement after each component line to prevent the code from failing. This would look like:
function App(props) {
  const { role } = props;
  switch (role) {
    case "author":
      return <AuthorLayout> Let’s write something </AuthorLayout>;
    case "admin":
      return <AdminLayout> Here are the latest reports </AdminLayout>;
    case "moderator":
      return <ModeratorLayout> These are the ongoing events </ModeratorLayout>;
    default:
      return <GuestLayout>Your current feed</GuestLayout>;
  }
}
You can use either React design pattern; hence you can use whichever suits your case.
React Design Pattern Switch/Case Best Practices
It can be used anywhere in React app for handling multiple conditional renderings with only one variable to evaluate the condition.
Searching for a ReactJS Development Company?
Hire Certified Developers from Aglowid to build scalable feature-rich ReactJS Solution
7. Render Props Pattern
Main Purpose: Passing a function as a prop to a component, allowing the component to render its children dynamically based on the function’s logic, promoting flexiblity and code reusability.
Render props are one of the top React Design patterns used to solve the logic repetition problem. React defines Render Props as a ‘technique for sharing code between different React components using a prop whose value is a function .’In other words, components pass a function as a prop to other components. The components that receive this function (as a prop) call it and use the returned value for rendering their content. Render prop is generally referred to as children prop since it is used as a function that passes down to components via its children prop.
How Render Props are used for tackling the cross-cutting problem in React
Cross-cutting, as previously discussed, refers to situations where various components in a React application often need some functionalities. It becomes difficult to encapsulate this function or requirement in a single component. We can tackle this issue with render props react design pattern since it allows us to pass prop as a function to a child component, allowing the parent component to share logic and state with the child component without paying attention to the implementation details of the child component. With this, we achieve Separation of Concerns, thus preventing problems like code duplication.
One such instance where using render props can prove beneficial is Authentication. You can create a single component for handling user authentication and pass its logic to other components using React’s render prop design pattern. This way, all components of your React app will be able to access the required authentication functionality and state without having to recode it at various places.
React Design Pattern – Render Prop Method Authentication Code Example
import React, { Component } from 'react';

class AuthProvider extends Component {
  state = {
    isAuthenticated: false,
    user: null,
  }

  login = (username, password) => {
    // perform authentication logic here, e.g., with an API call
    const isAuthenticated = true;
    const user = { username, email: '[email protected]' };
    this.setState({ is authenticated, user });
  }

  logout = () => {
    // perform logout logic here, e.g., with an API call
    this.setState({ isAuthenticated: false, user: null });
  }

  render() {
    const { isAuthenticated, user } = this.state;
    const { children } = this.props;

    return children({
      isAuthenticated,
      user,
      login: this.login,
      logout: this.logout,
    });
  }
}

function App() {
  return (
    <div>
      <AuthProvider>
        {({ is authenticated, user, login, logout }) => (
          <div>
            {isAuthenticated ? (
              <div>
                <p> Hello, {user.username}!</p>
                <button onClick={logout}>Logout</button>
              </div>
            ) : (
              <div>
                <p>Please log in to proceed</p>
                <button onClick={() => login('sampleuser', 'samplepassword')}>
                  Login
                </button>
              </div>
            )}
          </div>
        )}
      </AuthProvider>
    </div>
  );
}

export default App;
8. State Reducer Pattern
Main Purpose: Utilizing a reducer function for managing component state, enabling more controlled and predictable state updates by intercepting and modifying changes before they are applied.
State Reducer is another useful React design pattern that makes it easy to reuse existing components without breaking any existing APIs. Using the state reducer design pattern in React passes a reducer function to the component’s state instead of directly modifying it. It will take the current state with action and return a new state based on that action.
This action is generally in the form of an object with a type property that describes the performed action or any additional assets required to perform that action. For instance, the authentication reducer takes the initial state of an app as an empty object, and a defined action tells the reducer that a user logged in, which returns a new app state with the logged-in user.
When do we use Reducer in React?
When you have a complex app with various states that rely on complex logic, you can use the reducer react design pattern with your custom state logic and the initialState value, which can be either null or contain an object.
State Reducer Pattern Authentication Code Example
import React, { useReducer } from 'react';

// Define the initial state for Authentication
const initialAuthState = {
  isAuthenticated: false,
  user: null,
  token: null,
};

// Define the reducer function for Authentication
function authReducer(state, action) {
  switch (action.type) {
    case 'login':
      return {
        isAuthenticated: true,
        user: action.payload.user,
        token: action.payload.token,
      };
    case 'logout':
      return initialAuthState;
    default:
      throw new Error('Invalid action type');
  }
}

function LoginForm() {
  // Use the useReducer hook to manage state with the authReducer function
  const [authState, dispatch] = useReducer(authReducer, initialAuthState);

  function handleLogin(event) {
    event.preventDefault();
    // Perform authentication logic and dispatch the login action
    const user = { name: 'John Doe' };
    const token = 'sample-auth-token';
    dispatch({ type: 'login', payload: { user, token } });
  }

  function handleLogout() {
    // Dispatch the logout action
    dispatch({ type: 'logout' });
  }

  return (
    <div>
      {authState.isAuthenticated ? (
        <>
          <p>Welcome, {authState.user.name}!</p>
          <button onClick={handleLogout}>Logout</button>
        </>
      ) : (
        <form onSubmit={handleLogin}>
          <input type="text" placeholder="Username" />
          <input type="password" placeholder="Password" />
          <button type="submit">Login</button>
        </form>
      )}
    </div>
  );
}
Wrapping up!
These are some of the most common and advanced React component patterns that give developers access to utilize React in all its strength and glory for creating scalable, robust and secure React apps. Make sure to understand these React patterns in detail to ensure you follow the best practices and apply the right pattern at the right place to optimize your React project.
Also Check:


 Say
Say